

We recommend setting up web events using custom code Pixel and Events API. However, if you need an alternative solution that does not require heavy technical resources, you can use our Event Builder tool for event setup. This article walks you through how to set up events and parameters using Event Builder after you create and add the TikTok Pixel base code to your website.
Before you begin
Double check that all of your webpages have the TikTok Pixel installed.
Make sure you have admin or edit permissions for the pixel.
Get started
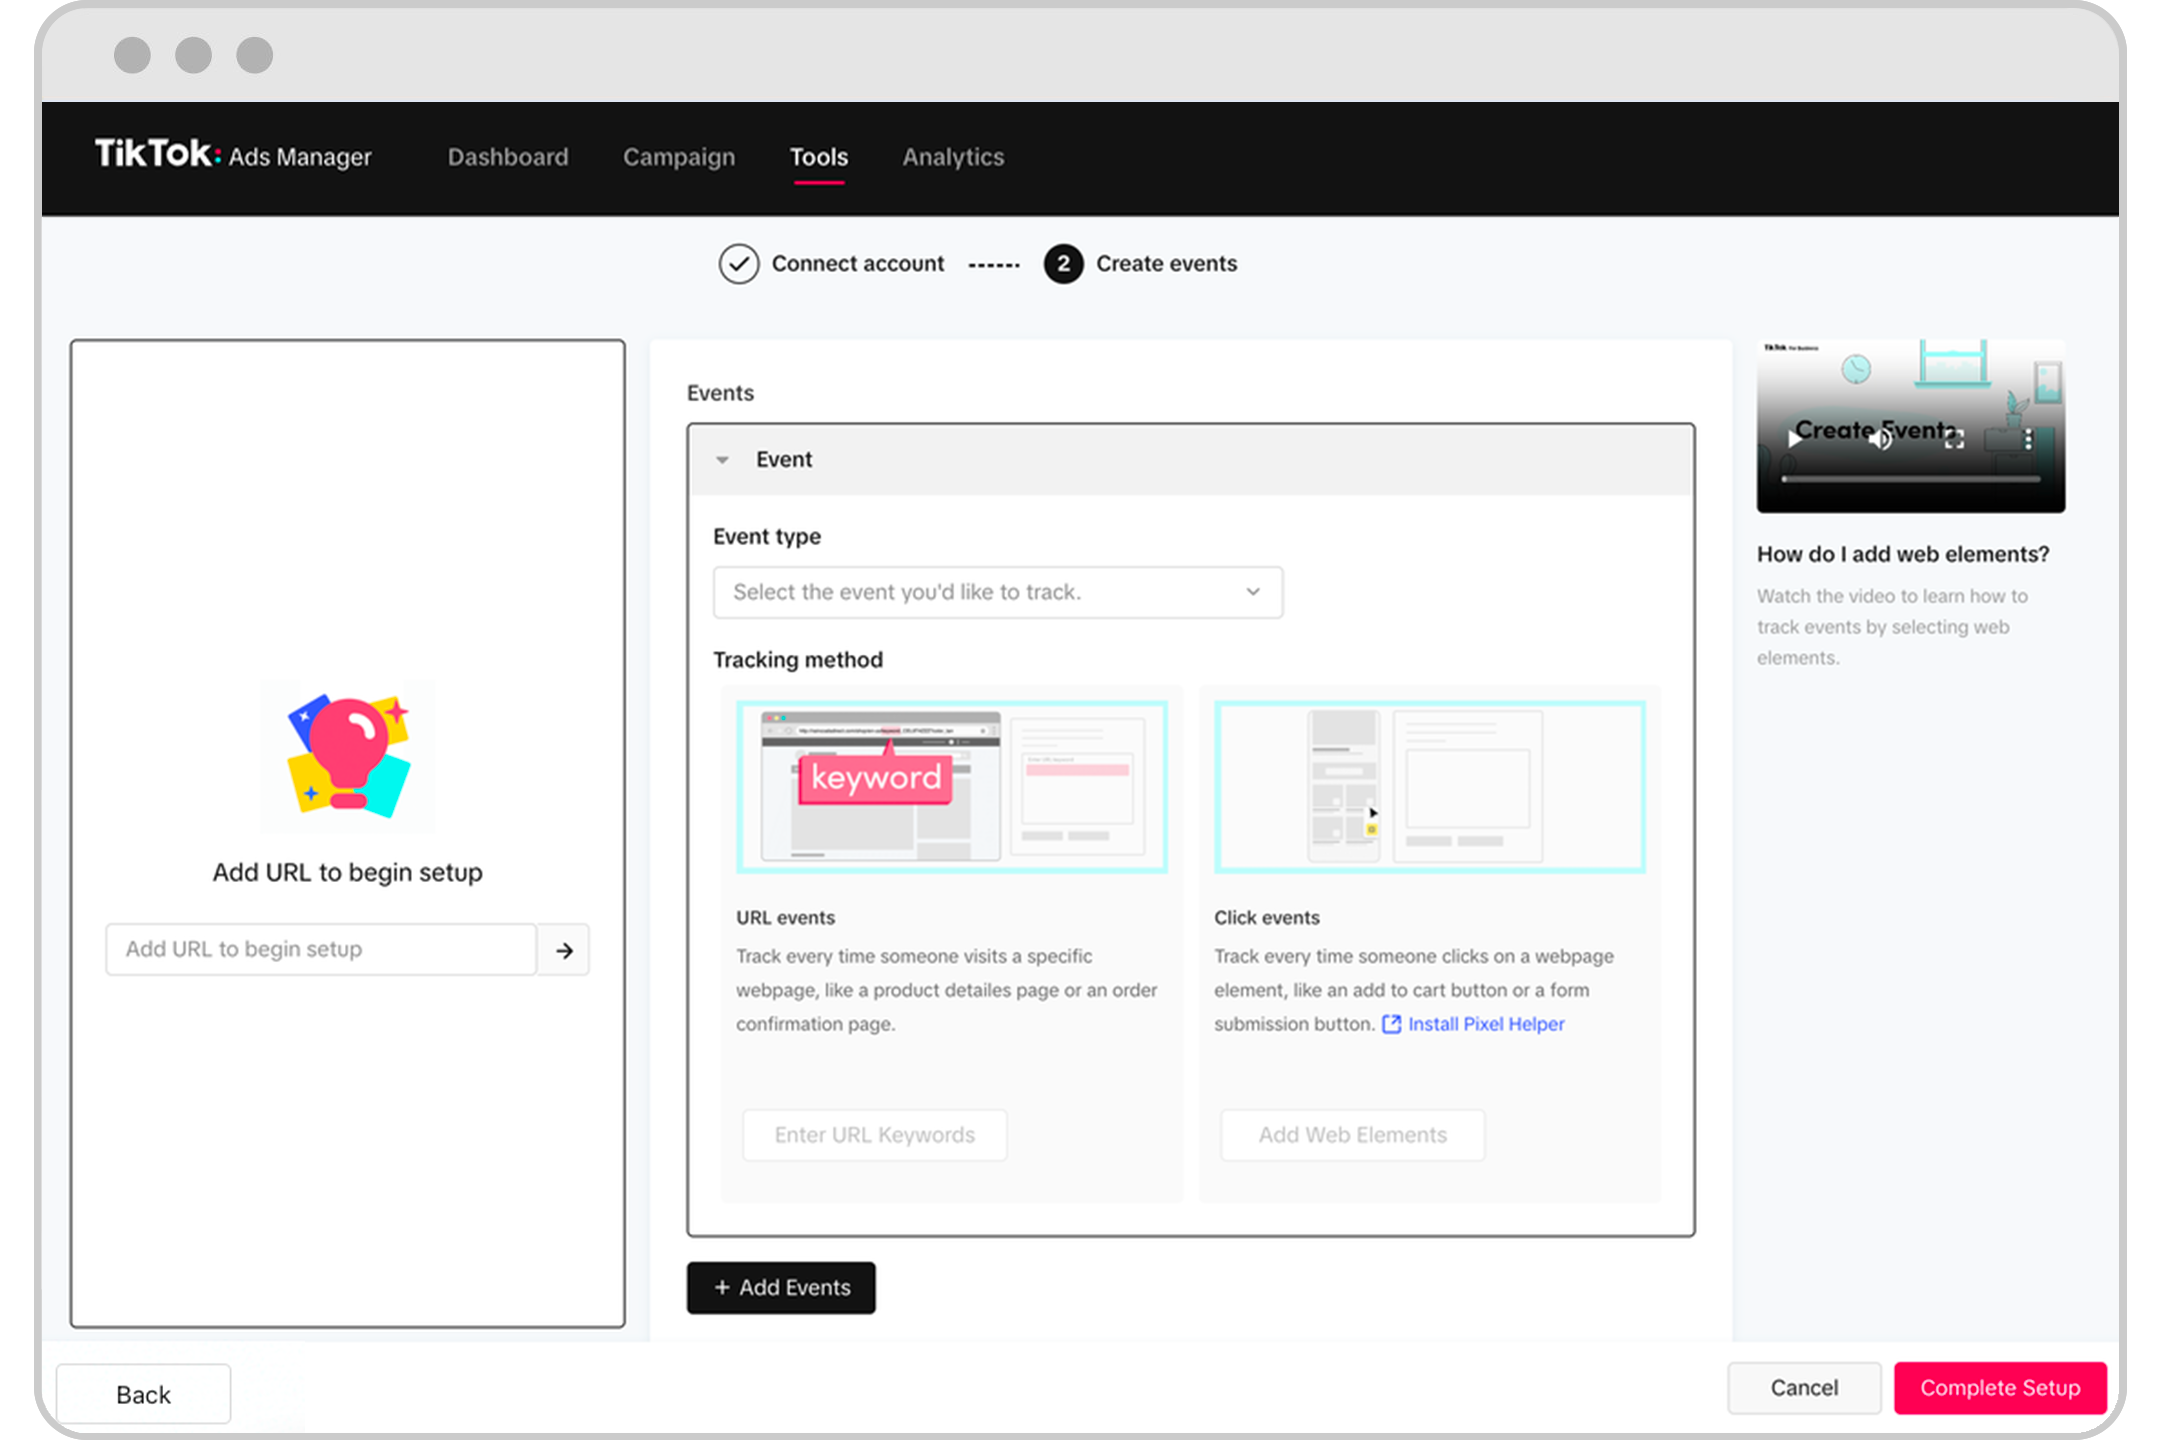
Once you've confirmed the TikTok Pixel is installed, click Next to reach the Create Events page. From here, you can create events using either URL keywords or Click Events.
These methods help you set up and assign rules for events that you want to measure, like 'add to cart' or 'complete payment'. For each event, there are 2 methods to choose from:
URL Events: Count user visits to specific pages on your website as events. This could include the confirmation page after a purchase or a thank you page. URL events use keywords contained in the URL of the page you are measuring.
Click Events: Count every time someone clicks on a specific element on your website as an event. This could be adding something to a cart, submitting a form, or downloading an app. Click events use web elements of the buttons or links you want to measure.
Watch our tutorial video before getting started:
Create URL Events
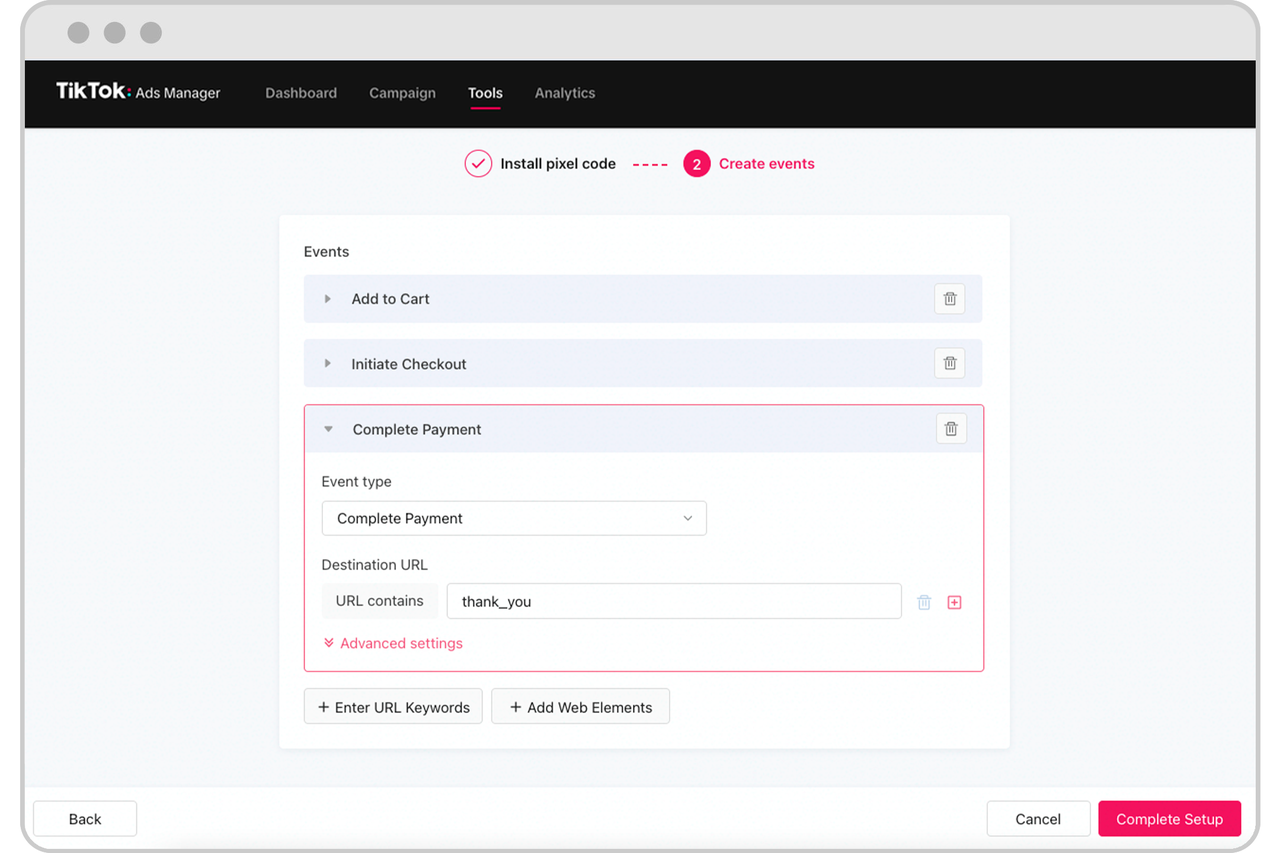
Select the desired Event Type and then Enter URL Keywords to get started.
Fill in the keywords from the URL of the page you want to measure.
For example, if you want to measure:
https://www.sample.com/id123456/thankyou Enter 'thankyou'
To add additional keywords to this event, click the (+) symbol to the right and input one keyword at a time.
Note: When setting up URL keywords, do not enter keywords that may be duplicates of one another. For example, if you add "cart" as one keyword and then "cart/123", this may create duplicate firing of events due to overlapping trigger rules.
Add parameters (see value & content parameter sections below).
Create more events by clicking + Enter URL Keywords or + Add Web Elements.
Create click events with Web Elements
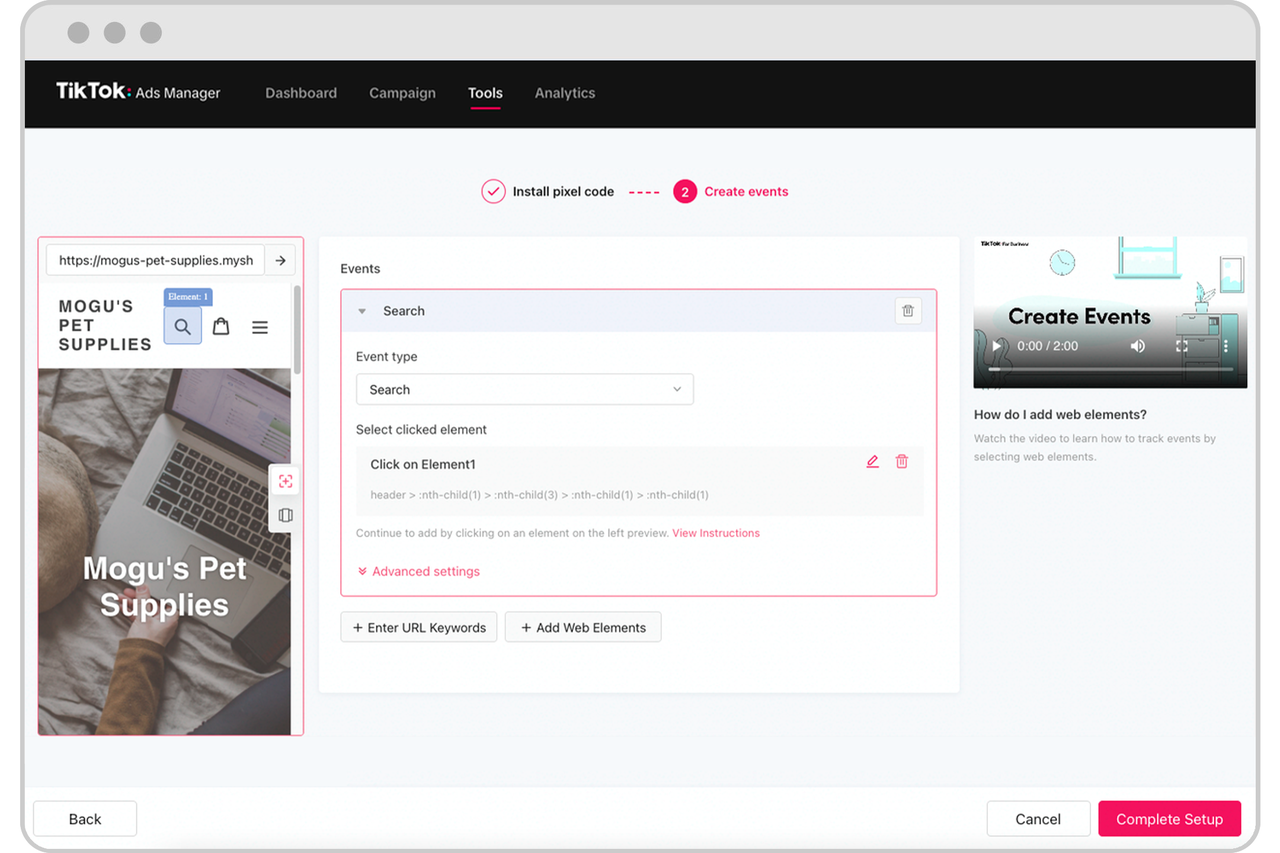
Select the desired Event Type for the click event.
Input your website’s URL in the preview on the left side of the screen to sync your website with the event setup which mimics how your website will show up in the TikTok app.
Once connected, use the ‘selector’ mode to add web elements or the 'navigation' mode to move around your website.
Once your website is synced in the preview and in your mobile device, click on '+ Add Web Elements' to get started.
Selectable web elements are highlighted in blue. Click to record an element as CSS selector code under ‘Select clicked element’.
Add parameters (see value & content Parameter sections below).
Create more events by clicking '+ Enter URL Keywords' or '+ Add Web Elements'.
Set up value and currency parameters with Event Builder
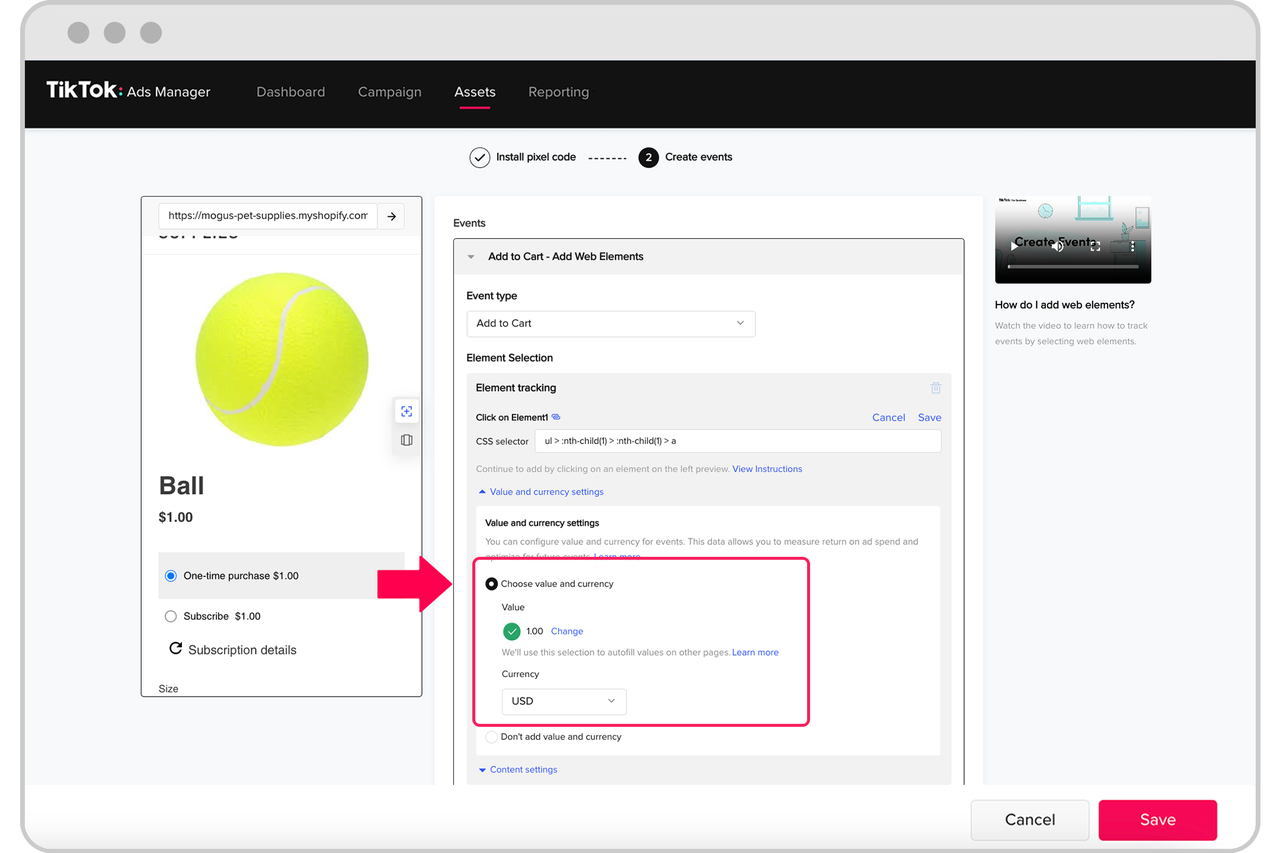
Once you've selected your event type and setup method, you can also set up value and currency parameters, which are required for ROAS reporting and Value Optimization.
Click the drop down for "value & currency" and select "Choose value & currency on page" to add a value parameter.
Select the value that corresponds to the event you've identified on your page. After you select a value, Event Builder will be able to dynamically fill values onto other pages.
Under currency, select your currency from the drop-down menu.
Note: This setup is best for one currency. If you have a more complex website with multiple currencies, we recommend you use a more advanced setup tool for parameters such as Custom Code or Events API.
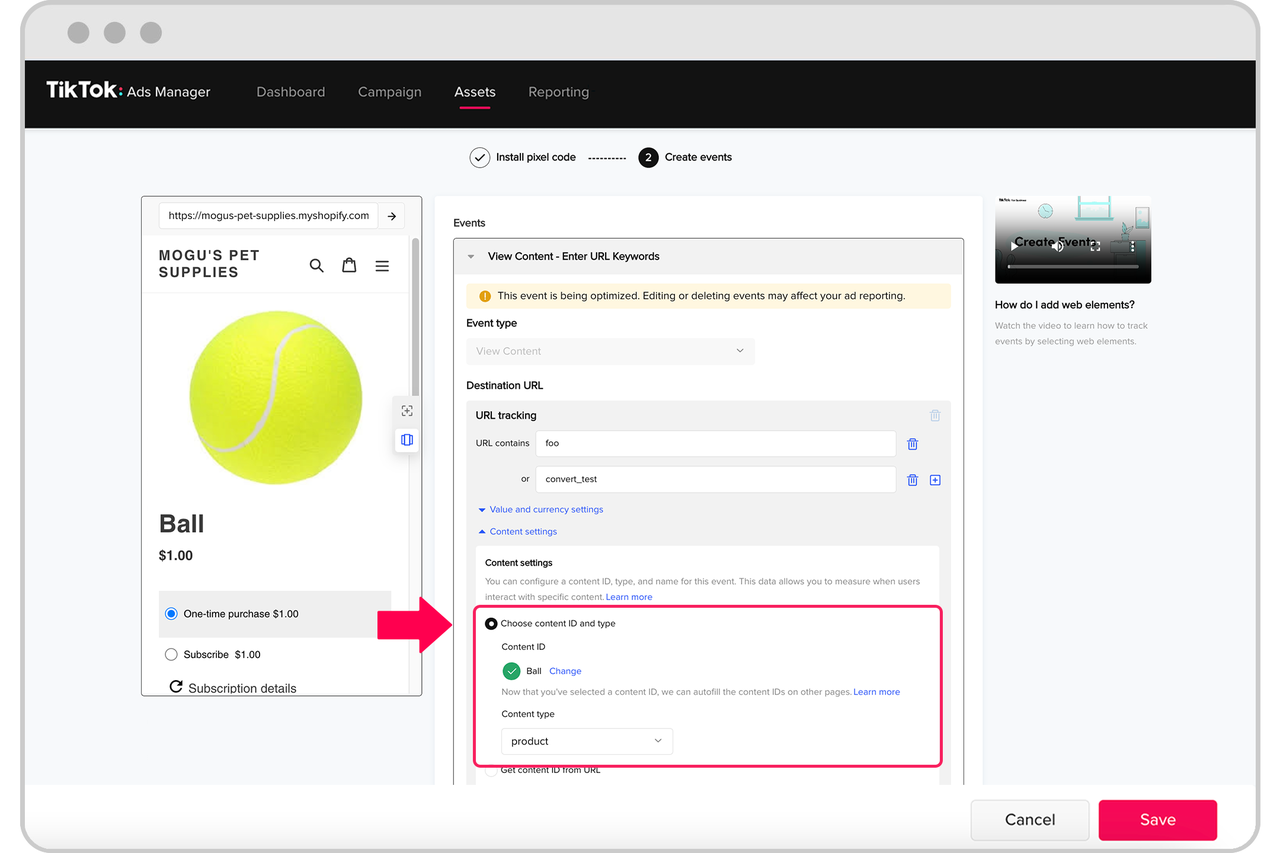
Set up content parameters with Event Builder
Once you've selected your event type and setup method, you can set up content parameters (content id and content type), which are required for Video Shopping Ads and Catalog Management:
Click the drop down for "Content ID and Content Type" to add a content parameter.
You can either select the content id from your web page if the content id is visible on the page or you can choose to extract content id from URL if the content id appears in the URL of your website.
Select the content type.
Finish
After you've set up events and parameters, you're all set! If you encounter issues, we recommend referring to Web Diagnostics or Pixel Helper for troubleshooting support.