How to create an Instant Form in TikTok Ads Manager
If you are looking to create a native experience for potential customers, our in-app instant form solution offers flexibility in lead capture and management. Customers can engage with your lead generation ad in two ways:
By clicking the CTA to open an Instant Form.
By answering a question directly through the Form Card on the in-feed video, providing a more streamlined and seamless interaction.
Instant Form allows customers to share their contact information, answer your questions, and learn about your business.
Before you begin
Review the questions you plan to ask in the lead ad campaign as well as the Lead Ads Terms and TikTok Advertising Policies.
You need a privacy policy URL link for your organization. You can use an existing privacy policy URL, so you don't have to create a custom one for lead ads
To create an Instant Form
Step 1: Access the Instant Form Editor
There are two options to access the Instant Form Editor in TikTok Ads Manager.
Option 1: From the Tools tab
Log in to TikTok Ads Manager.
Select the Tools tab.
Choose Instant Page.
Click Create and then select the Instant Form tab.

Option 2: During campaign creation
Create a Lead Generation Campaign.
At the ad group level, select Instant Form as the Optimization Location. Complete the remainder of your Ad Group settings and continue to the destination section.
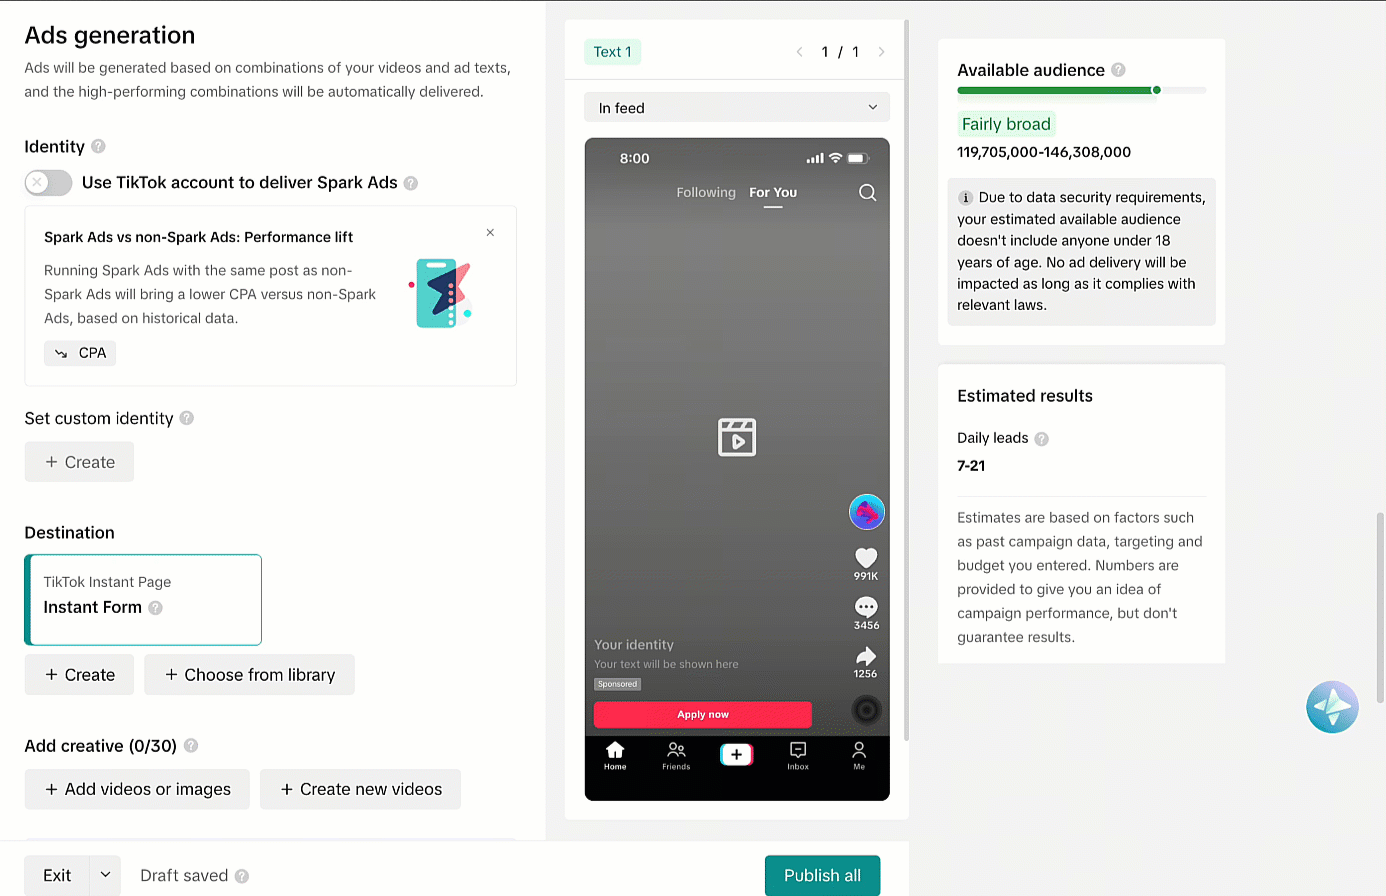
At the ad level, locate the Destination section, then click + Create.
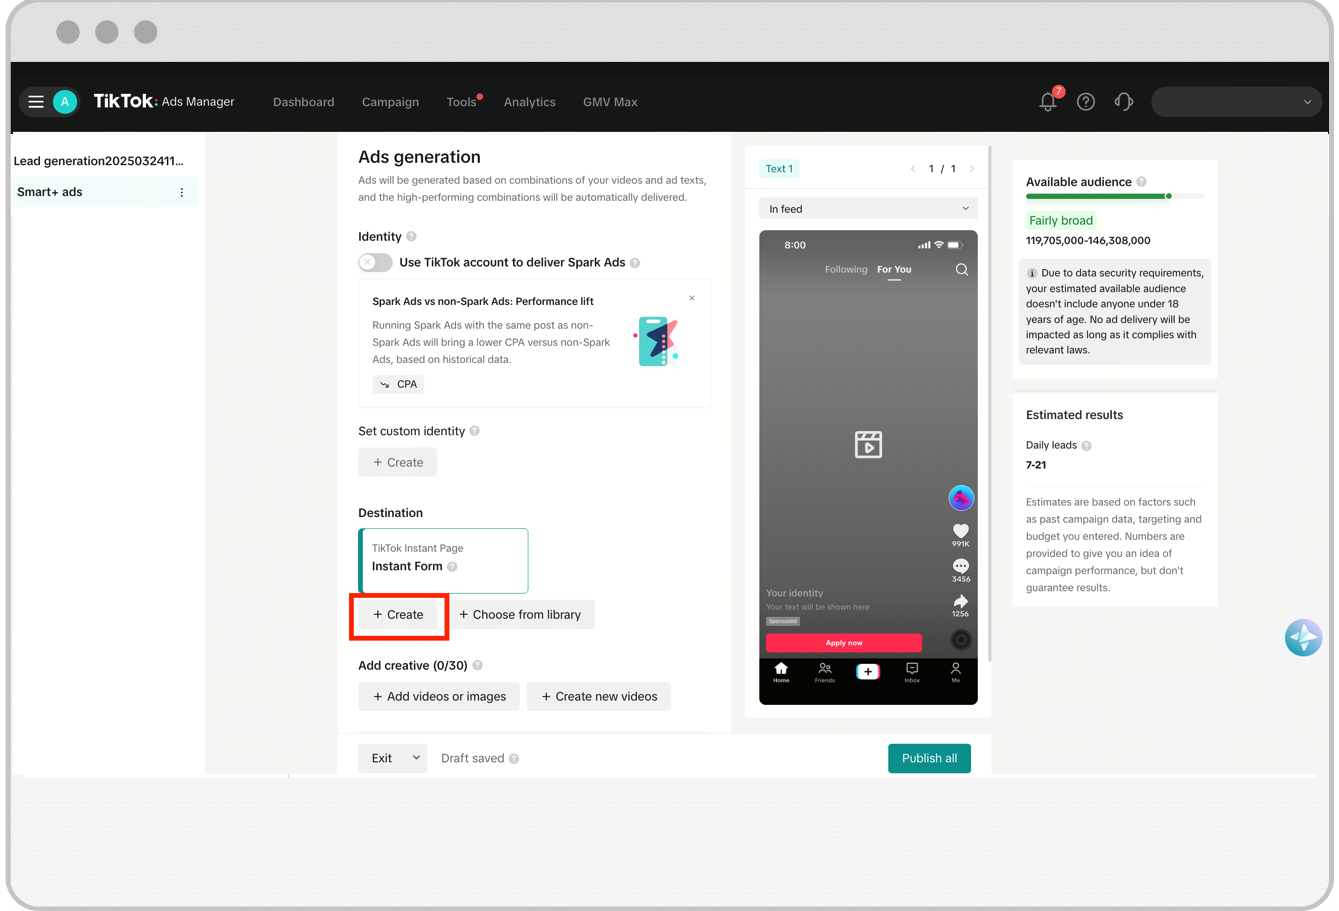
Step 2: Customize your Instant Form
Once you have accessed the Instant Form Editor, you can edit your Instant Form components.
Start with selecting a form template from the following options:
Use a template
Simple sign-up form: A layout that includes basic form modules (introduction and Questions) only. This template is useful for quick sign-ups and gathering contact information.
Rich content form: A layout allows additional custom content blocks, designed for providing more context and boosting user awareness and trust.
Lead qualification form: A card layout template with pre-filled custom questions based on user responses for more effective lead qualification.
Vertical templates: A card or form layout template with pre-filled custom questions to help with quick setup.
Generate with AI: Use AI to simplify the manual Instant Form creation process by generating a form based on your inputs.
Create your own
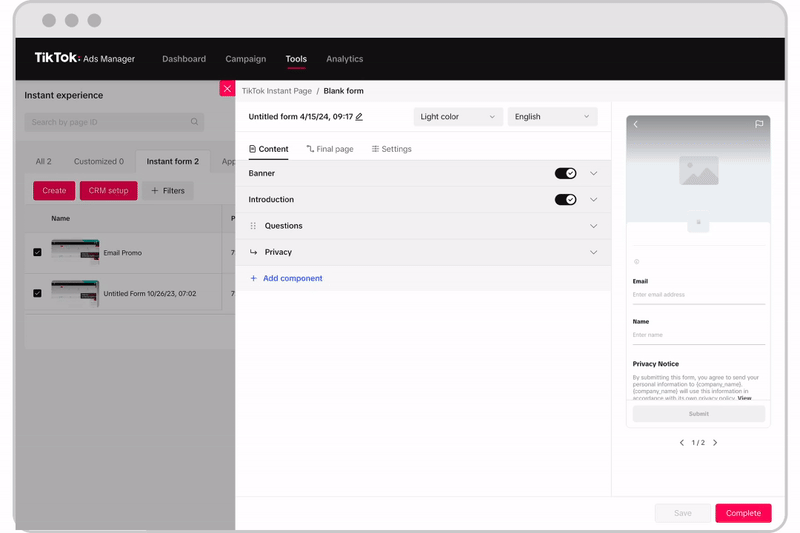
Blank form: Create your own form with all available content blocks and flexible layouts.
Card layout: Presents each custom question on its own page, ensuring a focused and engaging form-filling experience for longer forms.
2. After selecting a template, click Confirm.
3. On the form creation page, use the drop-down menus at the top to set up the color scheme and language of your form.

4. On the Content tab, customize the following components to design your form:

Form Components | Details | Requirement / Availability |
Banner | The Banner lets you display your brand or product on the top of your Instant Form using an image or carousel. | - Form layout: Optional - Card layout: N/A |
Introduction | The Introduction section allows you to share some information about your business and the purpose of your form. You can add a display name, headline, logo (optional) and promotion slogan (optional) in this section. | - Form layout: Optional - Card layout: N/A |
Welcome Page | The Welcome Page section allows you to set up the background image, title and description for the first page of your Question Card form. | - Form layout: N/A - Card layout: Required |
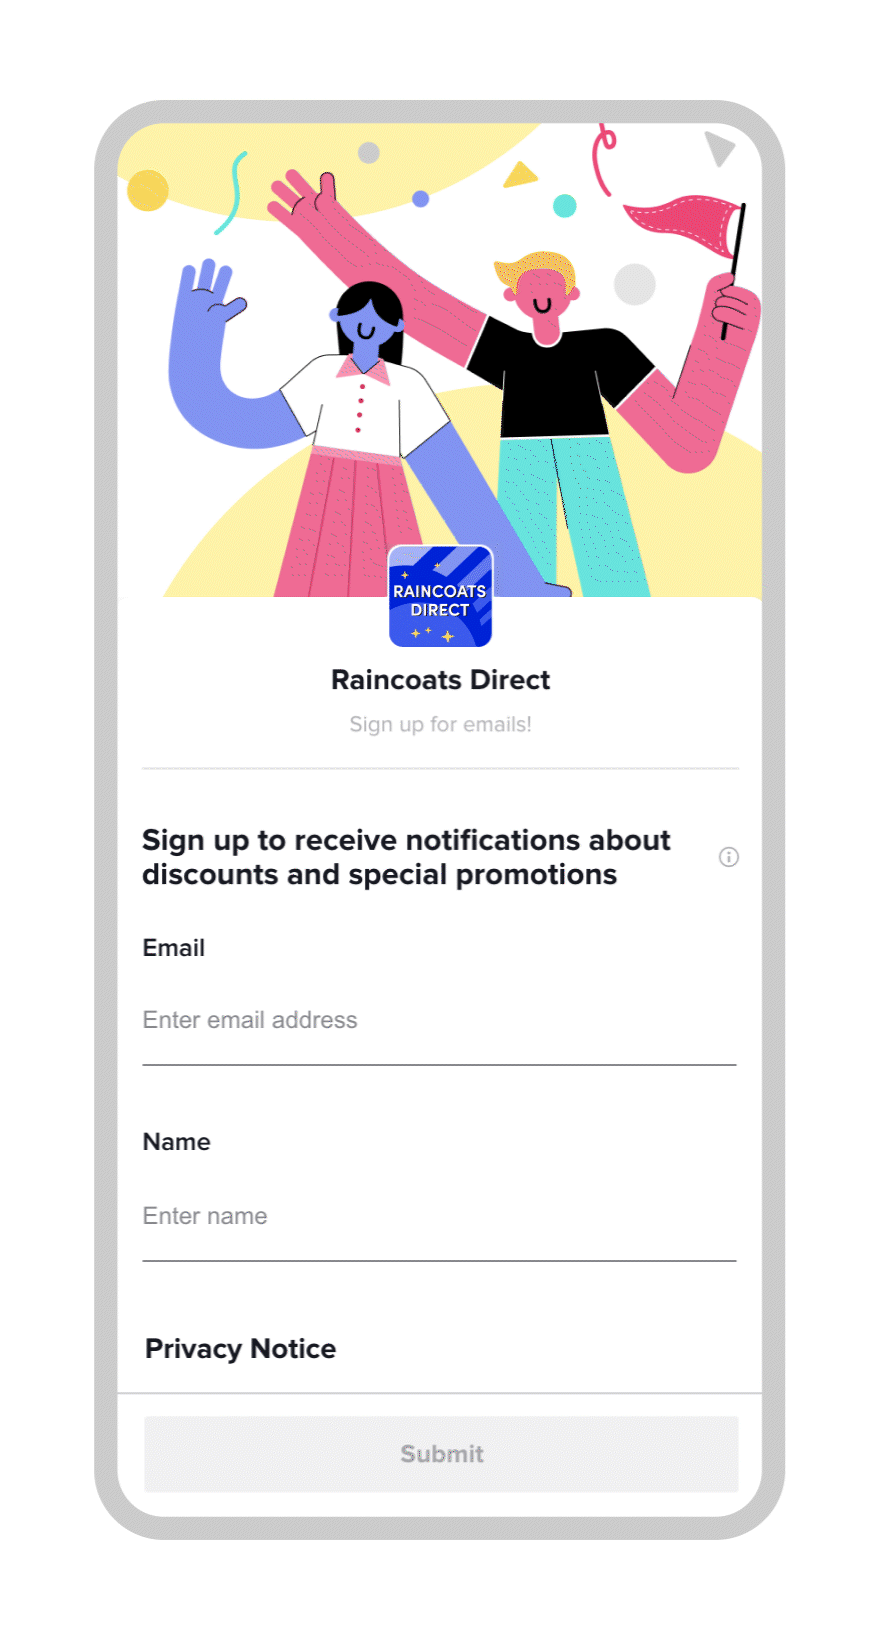
Questions | The Questions section allows you to create Custom Questions to ask questions related to your business or products, and gather Personal Information for future contact. For more details, refer to Instant Form question types and settings. Note: To use the Form Card format, make sure your form meets the following criteria: - Limit to 3 questions or fewer and can only include Personal Information questions (with any combination of name, email, and phone number) Or - Begin with a multiple choice custom question | Required for all forms |
Privacy | The Privacy section requires you to list your Company Name and enter a Link URL to your company's privacy policy on your landing page or website. You can optionally toggle on the Custom Disclaimer option to add additional Terms and Condition to the default TikTok privacy policy. If enabled, you can include additional "required" or "optional" disclaimers for user consent. For required consents, users have to give their consent in order to submit the form. Note: The Form Card format is not available if there is a custom disclaimer. | Required for all forms |
Custom Components | The Custom Components section allows you to add custom structured content blocks to provide more context and information. Available content blocks include product details & benefits, testimonials, steps, about us, FAQ, text, image, and carousel. For more information, refer to Instant Form Custom Components. | - Form layout: Optional - Card layout: N/A |
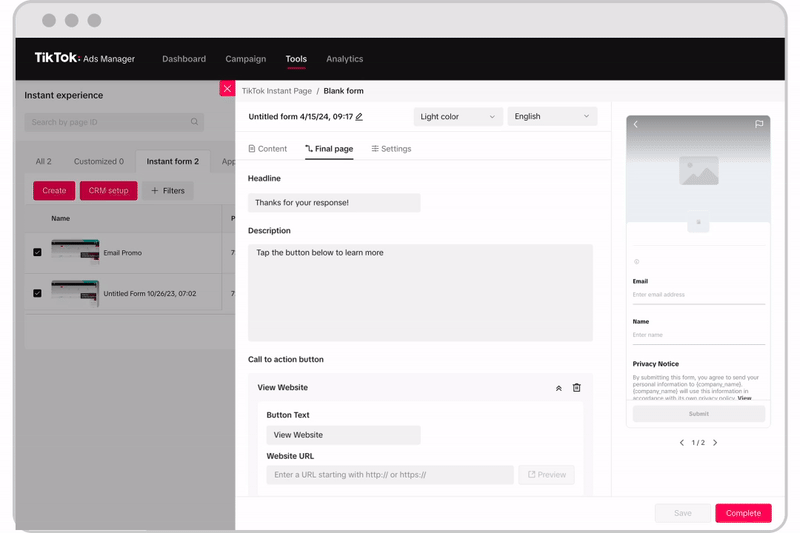
5. Once you've finished setting up the Content of your form, click on the Final Page tab to add a Thank You message and inform people about what happens once they submit your form. You will be able to add a Headline and a Description on this page. Additionally, you can add your Call-to-Action Button, which will allow you to drive traffic to your website and/or an app install page. A Final Page is required for all forms.
Note: If you use logic settings in your form, you have the option to set up two different Final Pages for preferred leads and not-preferred leads on this tab.
Step 3: Set Up form type and tracking
After you finish customizing your form content, navigate to the Settings tab to select Form Type, customize Field Names, and add Tracking Parameters to your form.
Form Types:
More Volume: prioritize the volume of leads, where no additional review page is added for users prior to submitting the form. More Volume is selected as the form type by default.
Higher Intent: focus on leads with higher intent by adding a review screen and CAPTCHA after users click Submit on your form to verify that the lead is a real person. The review screen and CAPTCHA module will be automatically generated if you select this form type. Note: The higher intent form type is not available for the Form Card format.
Field Names:
The Field Names section allows you to customize the field names shown in the dowloaded lead file, or in your CRM system. You may want to do this if you have your CRM system integrated with TikTok and wish to match the TikTok lead data field names with your CRM system data fields. The custom field names are not visible to users.
Tracking Parameters:
Enter parameter name and value if you wish to identify which marketing channels or campaigns your leads are coming from. You can see your tracking parameters when you assess your lead data through API, CSV downloads, or within your integrated CRM system. The tracking parameters are not visible to users.
Step 4: Save and Complete
While you are creating your form, you can click Save to draft your form for later completion. Click Complete once you finish setting up your form to publish. The form cannot be completed if any required section remains incomplete; in such cases, a red exclamation mark will appear next to the incomplete section. Note that you cannot edit the form after you click Complete; however, you can copy an existing form from the Instant Page page, make changes to it and save it as a new form.
If the form is created on the ad creation page and you have integrated your CRM with TikTok, remember to Connect with your CRM system by clicking Connect to CRM. Learn more about Available CRM integrations for TikTok Lead Generation with Instant Form.
Note: There is no option to delete your Instant Form after creating it. However, you can replace an attached Instant Form or edit an Instant Form at any time if it's not published yet.