Cara Menggunakan Budget Manager untuk Menetapkan Batas Pengeluaran Akun Iklan
Anda dapat mengatur batas pengeluaran untuk akun iklan Anda menggunakan budget manager. Ketika jumlah pengeluaran akun iklan mencapai anggaran yang telah ditentukan (baik bulanan, harian, atau sekali pakai), iklan di akun tersebut akan dijeda dan berhenti menggunakan anggarannya.
Catatan: Jumlah anggaran tidak termasuk jumlah kredit iklan. Misalnya, jika anggaran ditetapkan sebesar 100 USD dan akun iklan memiliki kredit iklan sebesar 200 USD, Anda memiliki dua opsi berikut:
Jika Anda menetapkan anggaran sebesar 100 USD, kampanye akan dijeda saat biayanya mencapai 100 USD.
Sebaiknya tetapkan anggaran sebesar 300 USD jika Anda ingin menggunakan saldo 100 USD dan kredit iklan 200 USD.
Tabel di bawah ini menjelaskan opsi batas pengeluaran dengan budget manager dan contoh penggunaannya.
Opsi budget manager | Contoh penggunaan |
Sekali pakai | Jika Anda punya anggaran khusus, opsi ini akan memungkinkan Anda untuk menyesuaikan anggaran sebelumnya atau meresetnya kapan saja. |
Bulanan/Harian | Jika tidak ingin melebihi anggaran bulanan/harian, Anda dapat memilih opsi ini agar tidak perlu memperbarui anggaran secara manual. |
Tak terbatas | Pilih opsi ini jika Anda tidak memiliki batasan anggaran pada level akun iklan dan ingin menggunakan lini kredit dan saldo tunai Anda dengan bebas. |
Sebelum memulai
Catatan: Hanya admin, atau manajer keuangan (dengan atau tanpa peran admin) yang dapat menjalankan fungsi dalam artikel ini.
Cara menetapkan batas pengeluaran akun iklan dengan budget manager
Buka Business Center, klik Keuangan, lalu pilih Manajemen pembayaran.
Tentukan akun iklan yang ingin Anda ubah batas pengeluarannya, lalu klik ikon Pensil.
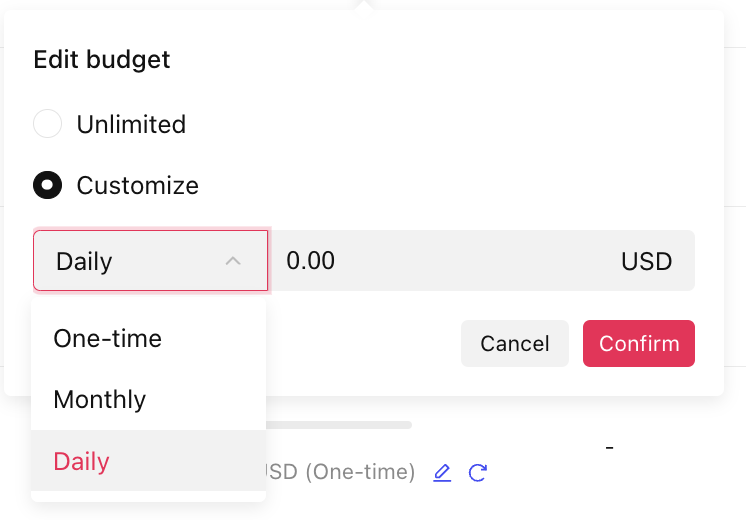
Klik opsi yang ingin Anda gunakan: Tanpa Batas atau Kustom. Jika memilih Tanpa Batas, pengeluaran akun iklan Anda tidak akan dibatasi. Jika memilih Kustom, Anda dapat menetapkan batas pengeluaran akun iklan, baik bulanan, harian, maupun kustom.
Masukkan jumlah anggaran yang Anda inginkan.
Klik Konfirmasi.
Cara mengubah aturan budget manager secara massal
Buka Business Center, klik Keuangan, lalu pilih Manajemen pembayaran.
Pilih akun iklan dengan mencentang kotak di sebelah kiri halaman.
Klik Edit Massal.

Pilih aturan budget manager yang ingin Anda terapkan.
Masukkan jumlah anggaran yang baru.
Klik Konfirmasi untuk menerapkan aturan pada akun iklan yang dipilih.
Cara mengaktifkan aturan budget manager saat membuat akun iklan baru
Buat akun Auction Ads baru.
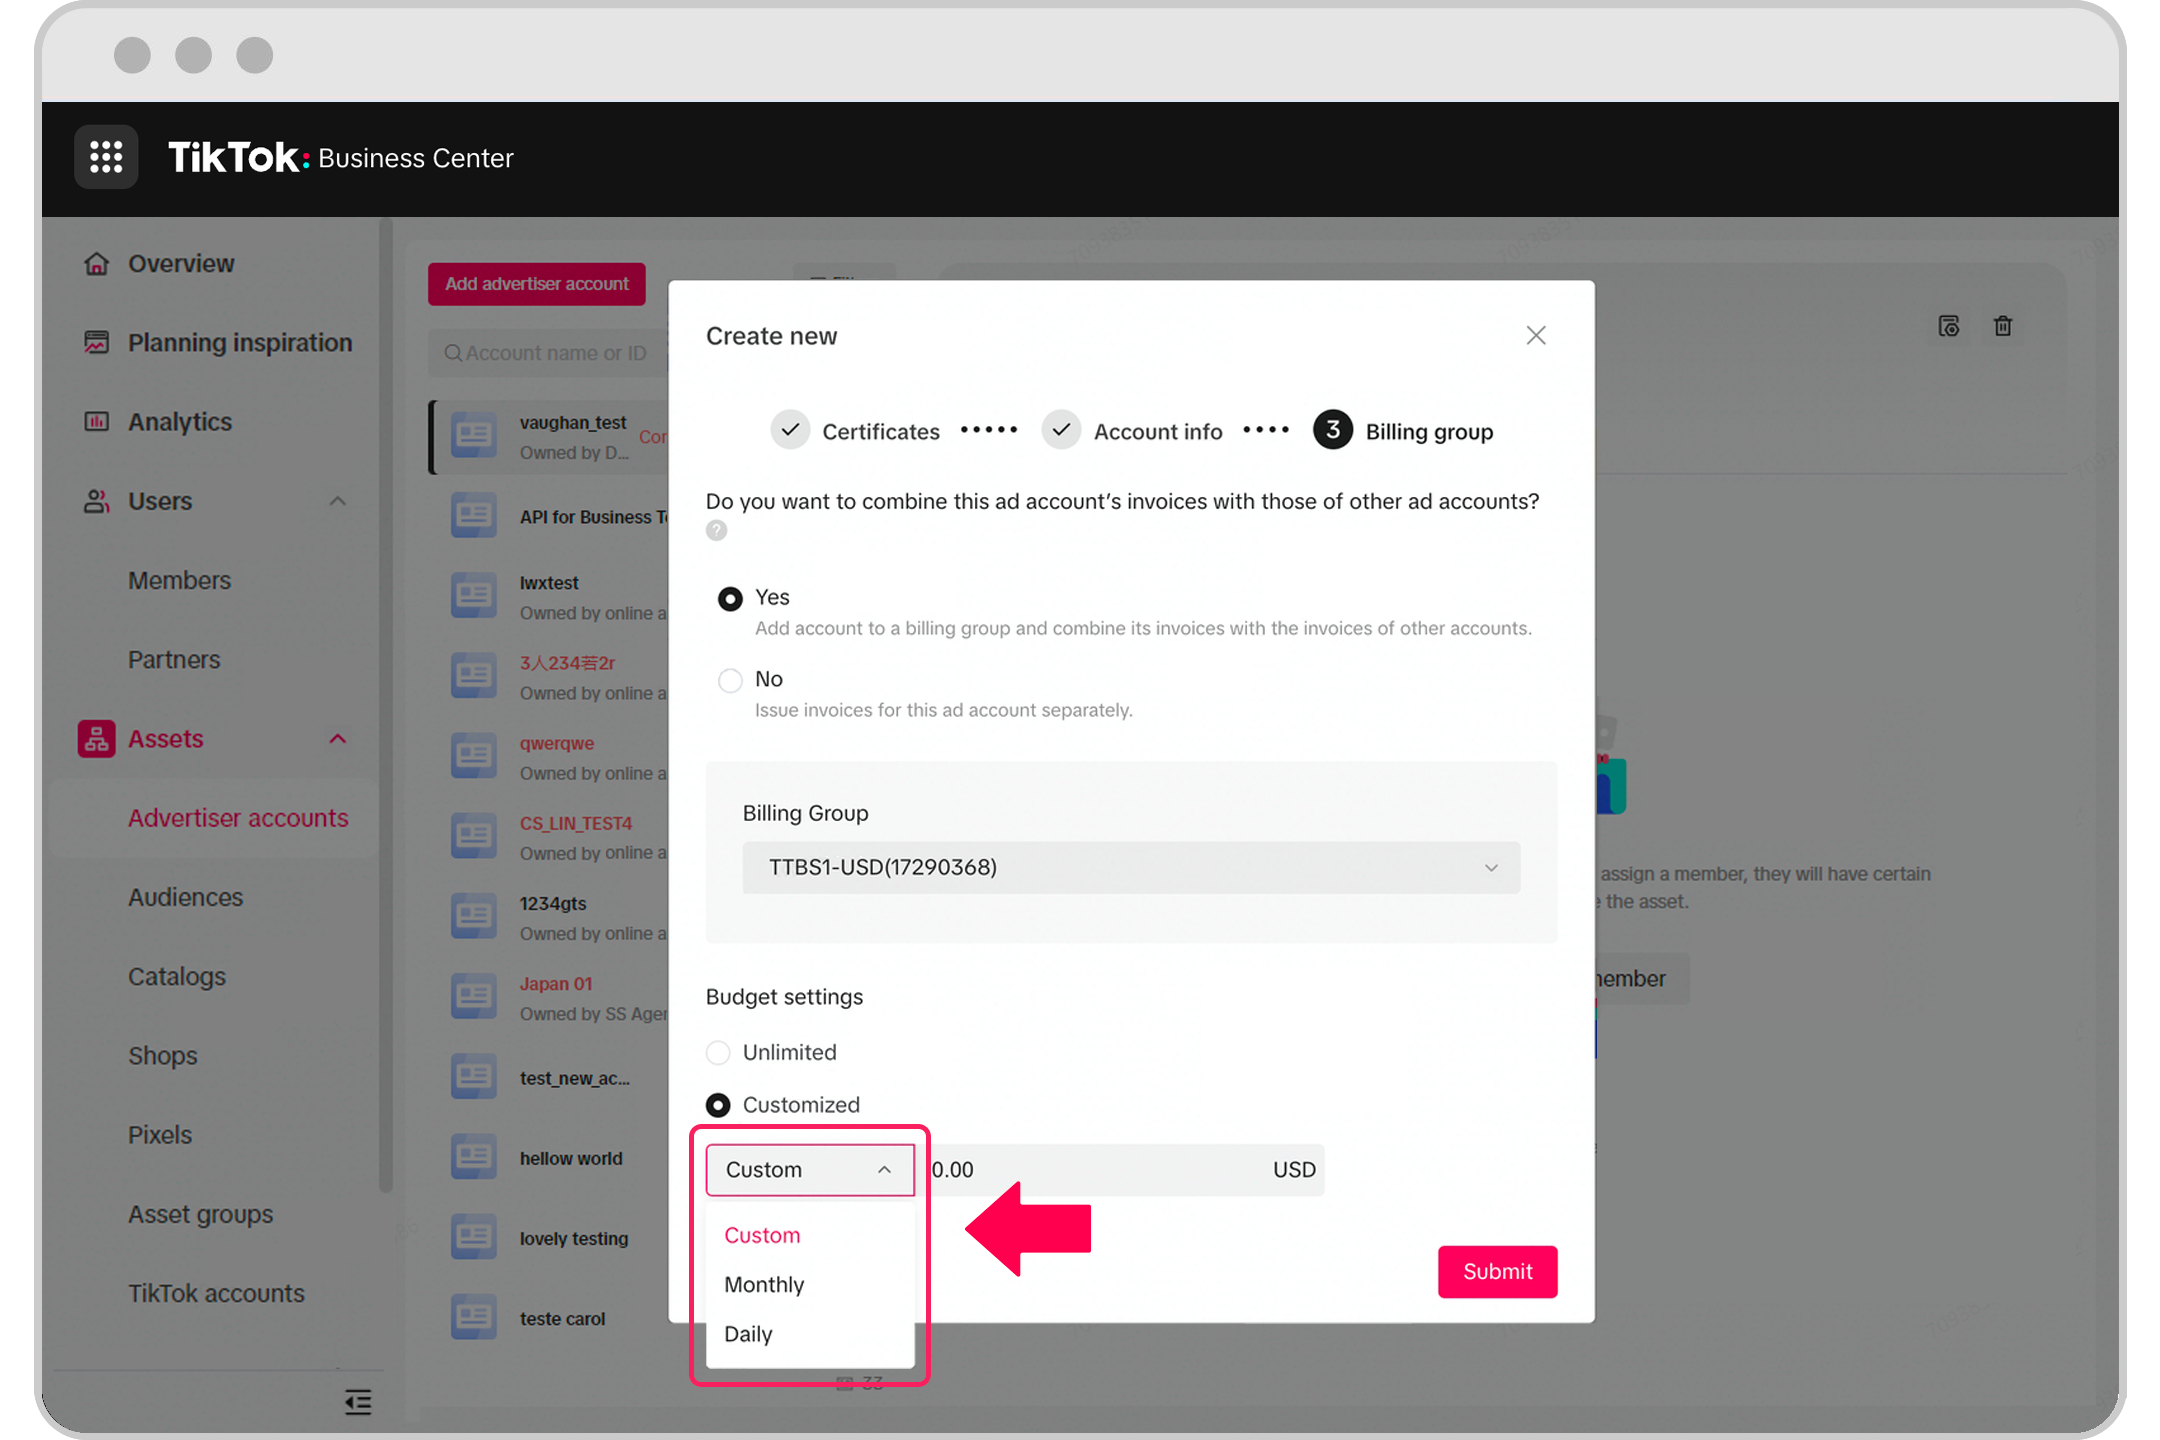
Pilih aturan budget manager yang ingin Anda terapkan.
Masukkan jumlah anggaran yang baru.
Klik Kirim dan akun iklan berhasil dibuat dengan aturan budget manager yang diterapkan.
Cara menambahkan dan mengurangi saldo budget manager
Dari Business Center:
Login ke Business Center.
Klik Keuangan.
Klik Manajemen pembayaran.
Klik Edit pada kolom budget manager dalam informasi akun iklan.
Pilih Edit jenis dan batas atau Edit hanya batas (tambah atau kurangi).
Untuk Edit jenis dan batas, pilih harian, bulanan, atau satu kali dari menu drop-down, lalu masukkan jumlahnya.
Untuk Edit hanya batas (tambah atau kurangi), pilih tambah atau kurangi, lalu masukkan jumlahnya.
Klik Konfirmasi.
Dari TikTok Ads Manager:
Login ke TikTok Ads Manager.
Buka tab Alat.
Pilih Pembayaran di bawah menu Pengaturan.
Klik Pembayaran.
Klik Edit di widget Anggaran.
Pilih Edit jenis dan batas atau Edit hanya batas (tambah atau kurangi).
Untuk Edit jenis dan batas, pilih harian, bulanan, atau satu kali dari menu drop-down, lalu masukkan jumlahnya.
Untuk Edit hanya batas (tambah atau kurangi), pilih tambah atau kurangi, lalu masukkan jumlahnya.
Klik Konfirmasi.
Cara melihat riwayat perubahan anggaran
Gunakan langkah-langkah berikut untuk menemukan riwayat perubahan anggaran akun iklan.
Dari Business Center:
Login ke Business Center.
Klik Keuangan.
Klik Manajemen pembayaran.
Klik Perubahan pada kolom budget manager dalam informasi akun iklan.
Lihat riwayat perubahan.
Selain itu, Anda juga dapat mengunduh perubahan dengan mengklik Ekspor.
Dari TikTok Ads Manager:
Login ke TikTok Ads Manager.
Buka tab Alat.
Pilih Keuangan di bagian Pengaturan.
Pilih Pembayaran.
Klik Perubahan di widget Anggaran.
Lihat riwayat perubahan.