How to set up TikTok Pulse Core campaigns
The following steps allow you to set up TikTok Pulse Core campaigns. This solution enables you to run in-feed ads in the highly trending, engaging, and brand-safe content that make up the Top 4% of videos on the platform. Learn more about TikTok Pulse Core.
Note: TikTok Pulse Core offerings are available for select customers. Please learn more about TikTok Pulse Core's availability.
Campaign level
Create a new campaign in TikTok Ads Manager.
Select Reach for your advertising objective.
For campaign type, select TikTok Pulse.
In settings, enter a campaign name.
Click Continue.
Ad Group level
Ad Group Name
Choose an Ad Group name that reflects the goals of this Ad Group.
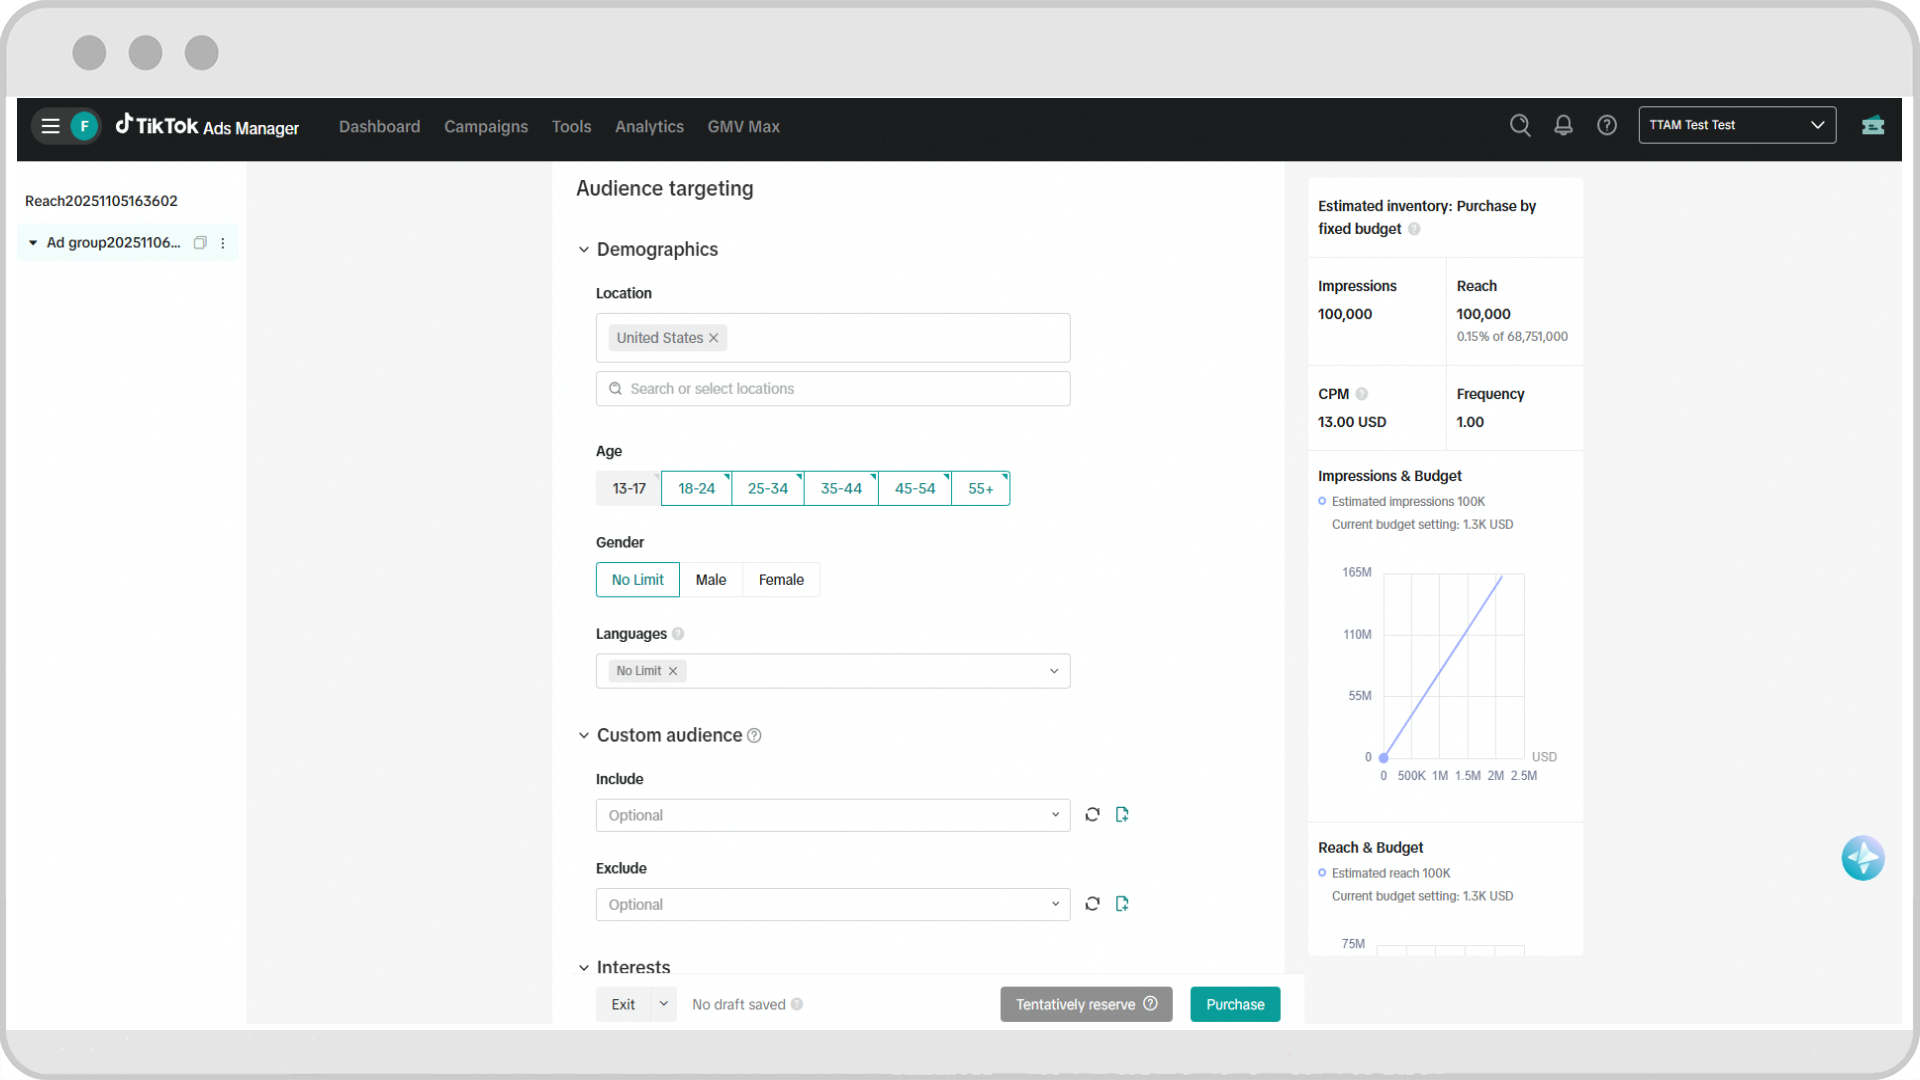
Audience Targeting
Select desired parameters for Audience, Demographics, Interest, and Device. Refer to the TikTok Pulse Planning Packet provided by your sales lead for targeting recommendations.

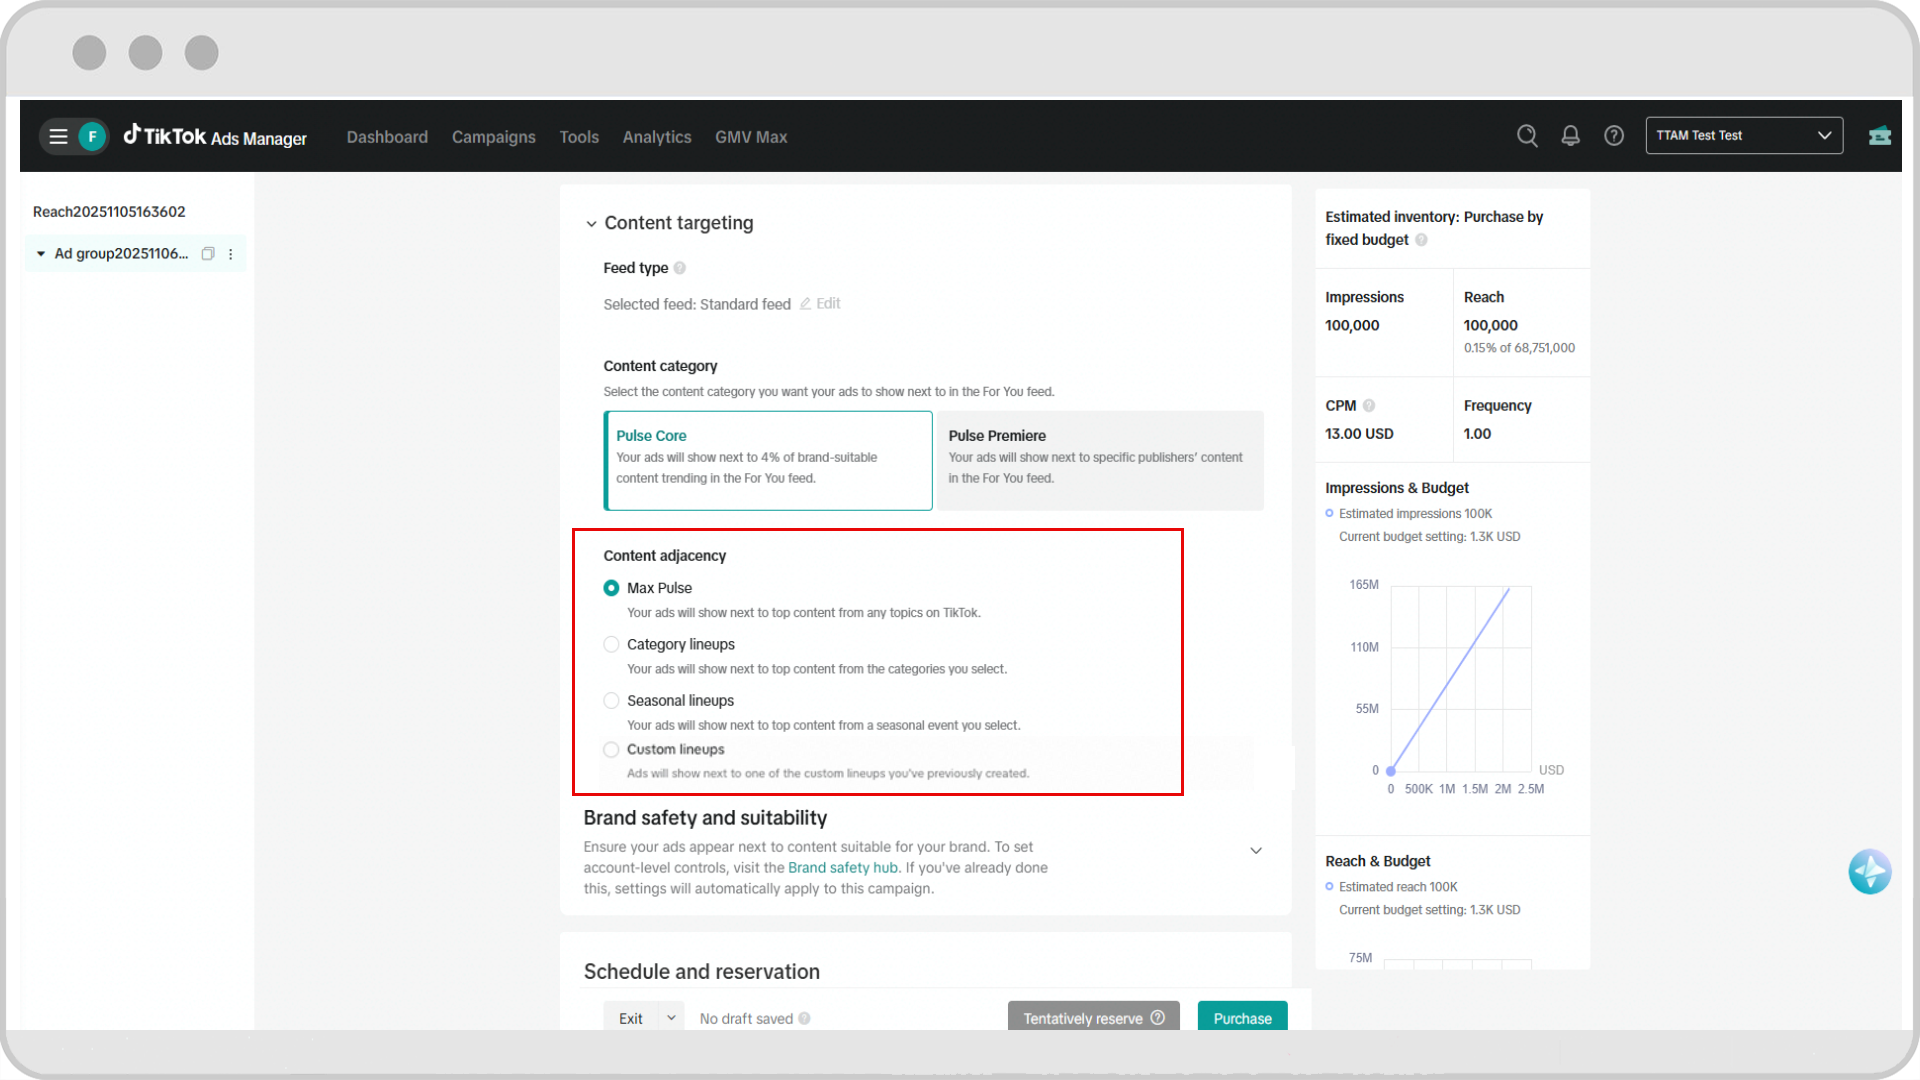
Content Targeting
In Content lineups, select the available TikTok Pulse Core offering: Max Pulse, Category Lineups, Seasonal Lineups, or Custom Lineups. You cannot select more than one type of content lineup for a single ad group.
Max Pulse is the default selection, which places your ad immediately after the hottest trending videos on TikTok regardless of category.
If you would like to target specific lineups, select from Category, Seasonal, or Custom Lineups if they are available.
Brand safety & suitability controls, visit the Brand safety hub to set your brand safety controls.
In Schedule and reservation:
Select a date range when you want to deliver your ads.
Ad delivery will begin at 12:00 AM in the timezone of the country/region selected in the Location, and the end time will be at 11:59 PM every day.
Ad delivery can be scheduled up to 225 days ahead of the current date.
Ad delivery can be scheduled between 1 and 90 days.
Ad Groups must be created at least 1 day before ad delivery starts
Select a reservation purchase method. Choose either Budget, Impressions, Reach, or Reach Percentage. Note: Reach and Reach Percentage will not be available for selection with Seasonal Lineups.
In Bidding and optimization, select how often you want people to see your ads. Choose from the default frequency or custom frequency cap. Refer to the TikTok Pulse Planning Packet (provided by your sales lead) for recommendations.
Seasonal Lineups will have a frequency cap of 4 times / 1 day enforced at the point of booking.
In Ad sequencing & schedule, select your desired delivery mode if you are using multiple creatives.
Learn more about Multiple Creative Delivery.
Once the Ad Group has been prepared, click Next. This will display the Submit Order and Reserve Audience screen.
To reserve your ad without adding your creative, click Just Submit Order.
If you are ready to add your creative, click Continue to Add then proceed to Ad level setup.
If more Ad Groups are needed for additional Pulse lineups you'd like to target, navigate back to the Create page in Step 1, go to Use existing in the Campaign level section, select the existing campaign, then repeat Steps 1-12 to set the new Ad Group.
Ad level
Enter an Ad name.
Select your Identity options, including the Display Name, Text, and Profile Image.
You can choose to also run a Spark Ad as your Pulse creative.
Traffic your Ad creative by uploading a video or choosing one from your library.
Learn more about Reach & Frequency creative specs, which apply to Pulse.
Add any Interactive add-ons.
Learn more about Interactive Add-ons.
Set your Destination page options, including adding a website URL and/or adding CTA buttons.
Learn more about Dynamic and Standard CTA buttons.
Add any pixels or 3P impression/click tracking URLs.
Learn more about supported third-party tracking partners.
If you’re interested in other third-party measurement solutions like viewability or brand suitability, connect with your TikTok sales lead.
Click the +Add button to traffic additional ads, if desired. Repeat Steps 3-6.
When you are satisfied with your ads, click Submit to send the ads to review.
Using tentative reservation to secure Pulse Core inventory
Tentative reservation is a method of reserving a campaign during its planning phase. Learn more about tentative reservation.
Note: If considering tentative reservation to maintain inventory for a Pulse Core campaign, we strongly recommend only making a tentative reservation if booking more than 30 days before the start date, or making a tentative reservation using the auto-purchase option within 30 days of the campaign start date.