Advertising on TikTok
TikTok accounts
Managing your Business Center
TikTok E-Commerce Partner Platforms
Developers
Create a campaign
Create an ad group
Creating ads in other TikTok tools
Consideration objectives
App promotion
Lead Generation
In-feed video
In-feed interactive
Non-feed placement
Interactive enhancements
Industry ad solutions
Ad auction optimization
Creative optimization
Creative partnerships
Smart+ Campaigns
App Measurement
Offline conversions
Web measurement
Insights and reporting
Shop Ads Measurement
Billing options
Billing management
Promotions, Ad Credits and Coupons
Troubleshooting billing and payment
Advertising Policies
Privacy practices and policies
Web measurement
Web Data Connections
Web Events & Parameters
TikTok Web Measurement Tools
-
- About TikTok Pixel
- How to Set Up and Verify TikTok Web Data Connection
- Enhance Data Postback with the TikTok Pixel
- How to Enable Auto Event Setup
- Troubleshoot with Pixel Helper
- How to troubleshoot Pixel activations not showing in TikTok Ads Manager
- About using cookies with TikTok Pixel
- About Web Modeled Conversions
- About TikTok Pixel for Ecwid
- About Single Page Application Pageview Measurement for TikTok Pixel
- How to troubleshoot Pixel visibility in TikTok Ads Manager
- About Events API
- How to get started with Events API
- About Events API Payload Converter
- About the TikTok Event Builder
- How to Set Up Events and Parameters with Events Builder
- Partner Integrations for Web Events
- How to set up TikTok Pixel with Google Tag Manager in TikTok Events Manager
- How to set up Events API for server-side tagging in Google Tag Manager
- About Pixel sharing in Business Center
- How to set up pixel signal postback
- How to set up a secure data connection with TikTok through SignalSight
- How to set up a TikTok conversions destination with Twilio Segment
- How to set up a secure data connection with TikTok through Tealium
- How to set up a secure data connection with TikTok through DataHash
- How to set up a TikTok conversions destination with Adobe
- How to set up a TikTok conversions destination with Tealium
- How to set up a secure data connection with TikTok through mParticle
- How to set up a secure data connection with TikTok through Hightouch
- How to set up a secure data connection with TikTok through Blotout
- How to set up a secure data connection with TikTok through Grivy
- How to set up a secure data connection with TikTok through Anytrack
- How to set up a secure data connection with TikTok through Gamesight
- How to set up a secure data connection with TikTok through Elevar
- How to set up a pixel implementation with TikTok through TicketMaster
-
TikTok Events Manager
Event Matching
TikTok Post Purchase Surveys
- Measurement /
- Web measurement /
- TikTok Web Measurement Tools /
How to set up TikTok Pixel with Google Tag Manager in TikTok Events Manager
Google Tag Manager is a tag management system that allows you to quickly add measurement codes and related code fragments collectively known as tags on your website. There are two methods to set up TikTok Pixel with Google Tag Manager:
Install TikTok Pixel in TikTok Events Manager (Recommended)
Learn about Events API and how to install both Pixel and Events API with Google Tag Manager.
Before you begin
Before you install TikTok Pixel in Events Manager for Google Tag Manager, you need to:
Set up a Google Tag Manager account and install it on your website.
Create a Google Tag Manager web container for the website. Your Container permissions must have Publish, Approve, Edit, and Read permissions.
Familiarize yourself with Google Tag Manager concepts like tags, triggers, and variables.
Create a TikTok Pixel or integrate an existing TikTok Pixel
Learn how to create an account and container and install a web container from Google's Help Center.
How to set up TikTok Pixel with Google Tag Manager in TikTok Events Manager
To install TikTok Pixel in TikTok Events Manager:
Go to TikTok Events Manager.
Click Data sources.
Choose the TikTok Pixel you want to connect.
Click Settings.
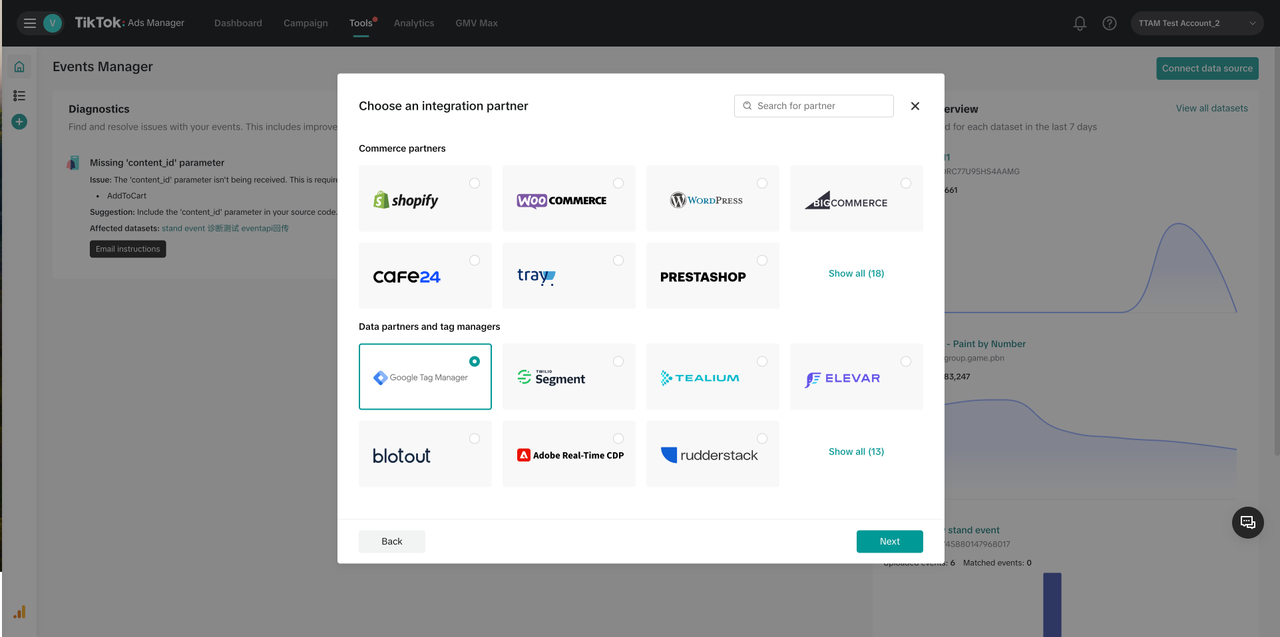
Go to Partner Platform and click Choose Partner.
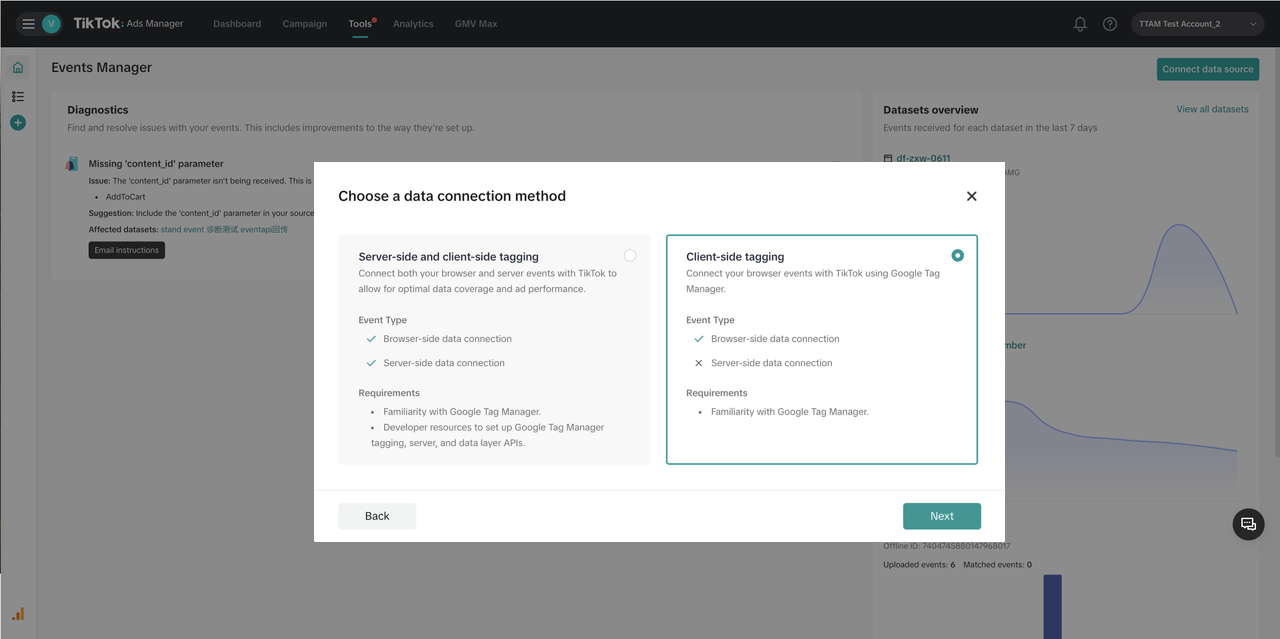
Click Google Tag Manager and click Next.

Click Client-side tagging.

Click Get started to log in to your Google account that is linked to your Google Tag Manager workspace.
Name your pixel if you created a new one.
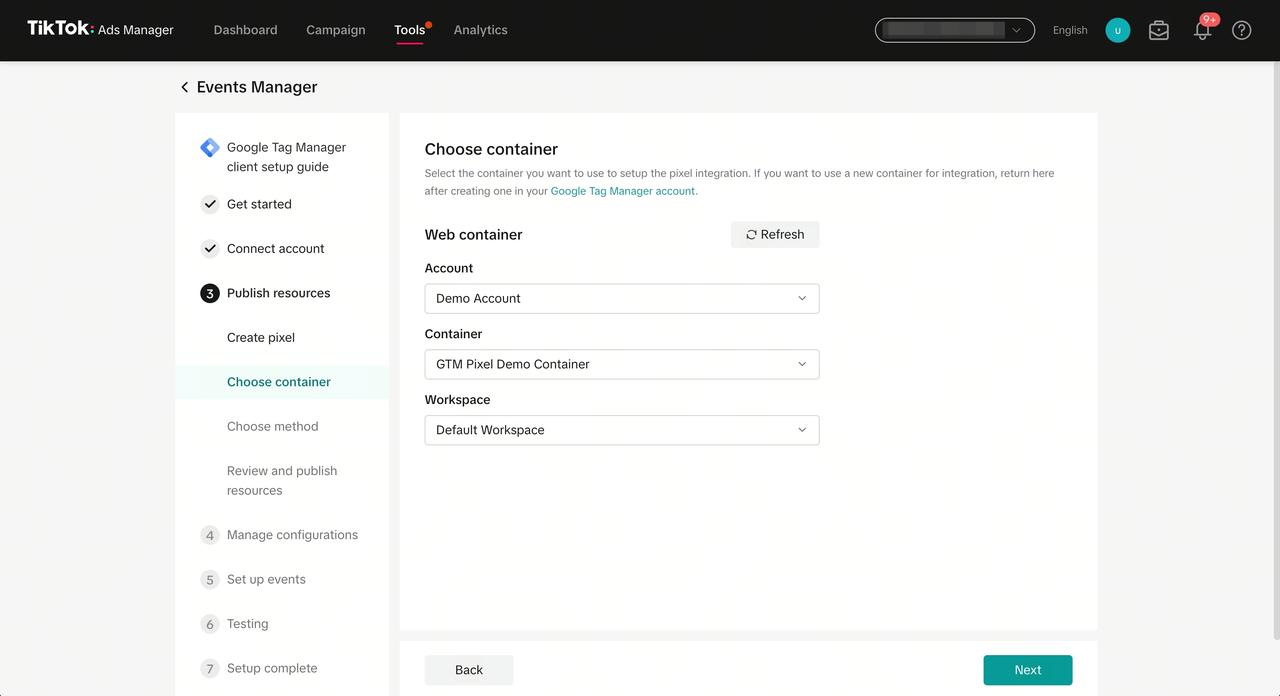
Select the Google Tag Manager account, Container and Workspace that you want to install the TikTok tags.
If you want to use a new Container, create one in your Google Tag Manager account, then return to this screen and click Refresh.

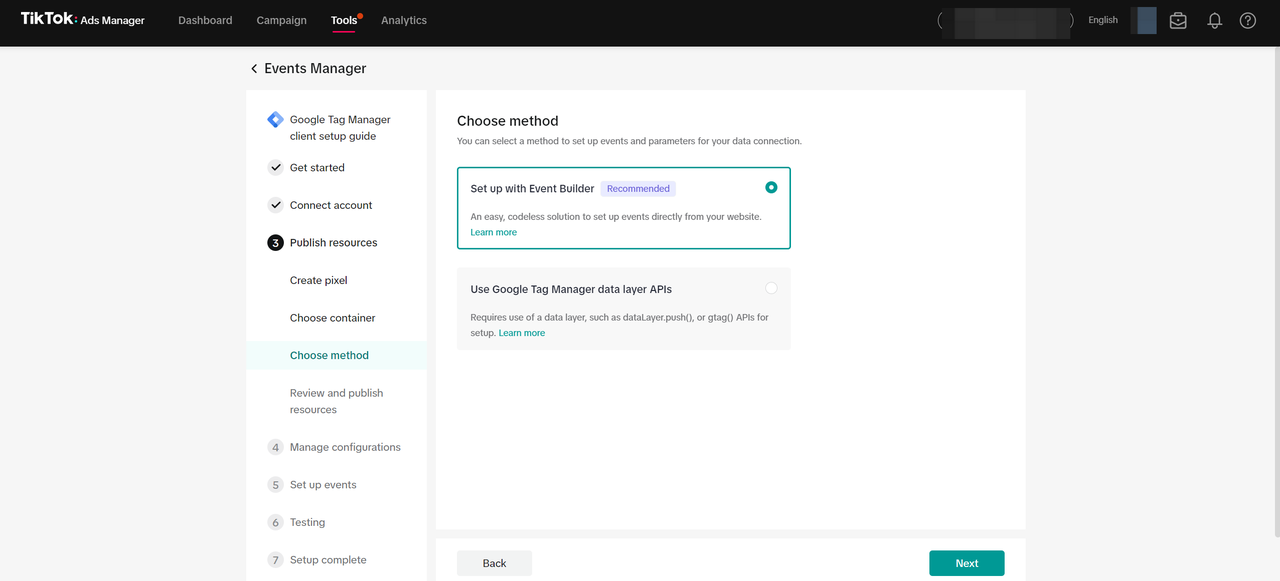
11. Select the method to set up events and parameters:
Set up with TikTok Event Builder (Recommended): You can create events and parameters directly from your website without requiring changes to website code. Learn how to set up events and parameters in Event Builder.
Use Google Tag Manager data layer APIs: A data layer is a JavaScript object that is used to pass information from your website to your Tag Manager container. This method installs TikTok tags and variables to automatically convert data layer events to TikTok Pixel events, and is best fit for websites already using a Google Tag Manager data layer to send custom event data. Learn more about setting up TikTok events with Google Tag Manager data layer APIs.

12. Review the pending changes to your Google Tag Manager account and confirm the account information is correct. Note: You won't be able to modify changes after you publish them.
13. When you're finished, click Publish.
The TikTok Pixel tag will be installed on your website. Refresh your website for the changes to take effect.
Considerations
When you set up Google Tag Manager, consider:
If your GTM workspace already has tags, variables, or triggers with the same names as the changes being published, those will be skipped to preserve your existing production GTM settings.
If you want to make any modifications to the published version or reset TikTok tags, variables, or triggers, see our Developer Help Center for instructions on reinstallation.
Click Publish to automatically install the tags, triggers, and variables necessary for TikTok Pixel to work properly on your website. Learn more about changes made to your GTM account.
If you get an error during set up, troubleshoot Google Tag Manager.
