How to create a rich content form
The rich content form is an Instant Form template for creating informative and engaging lead forms. With the rich content form, you can show more about your brand and offerings through structured content blocks directly embedded within the form.
How to create a rich content form
You can create a rich content form from the Tools tab or while creating a campaign in TikTok Ads Manager. Create a rich content form from Tools:
Log in to TikTok Ads Manager.
Select the Tools tab.
Choose Instant page.
Select Instant form.
Click Create.
Select the Rich content form template.
Create a rich content form while creating a campaign:
Create a Lead Generation campaign.
At the ad group level, select Instant Form as the Optimization Location. Complete the remainder of your Ad Group settings and continue to the destination section.
Locate the Destination section, then click + Create.
Select the Rich content form template.
Note: Connect your Customer Relationship Management system if you have one integrated on TikTok.
How to customize a rich content form
Click Settings: Set up basic settings for language, color scheme, and tracking parameters.
Click Banner and introduction: Add an image for the form background and your logo. Then enter the name, headline for the form, and slogan (optional).
Click Questions: Add questions for gathering potential customers' personal information and custom questions based on your business objective.
Click Privacy Policy: Add in your product details, benefits, testimonials, steps, about us, and FAQs.
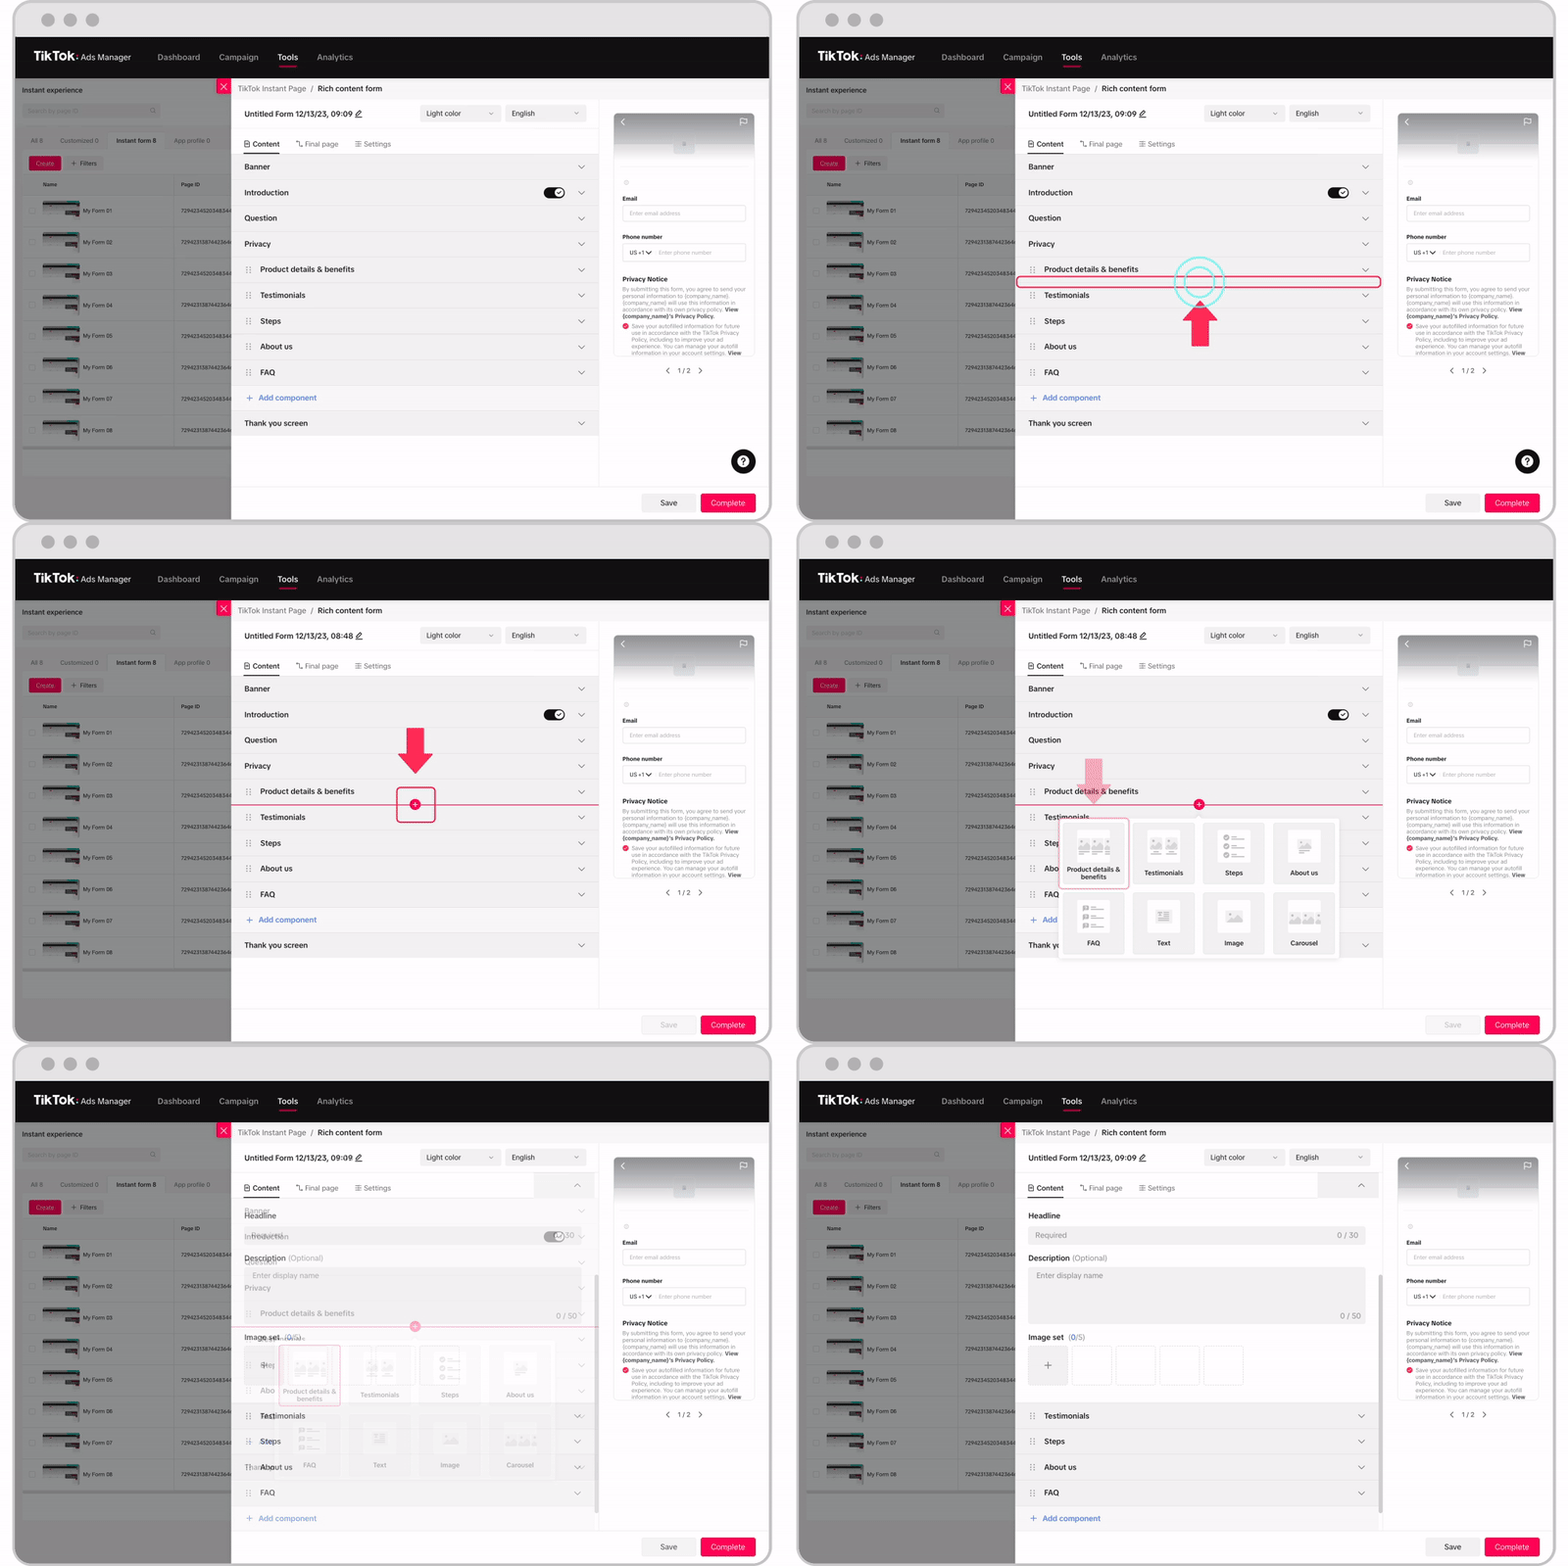
Click Add components: You can click the plus sign to add more components.

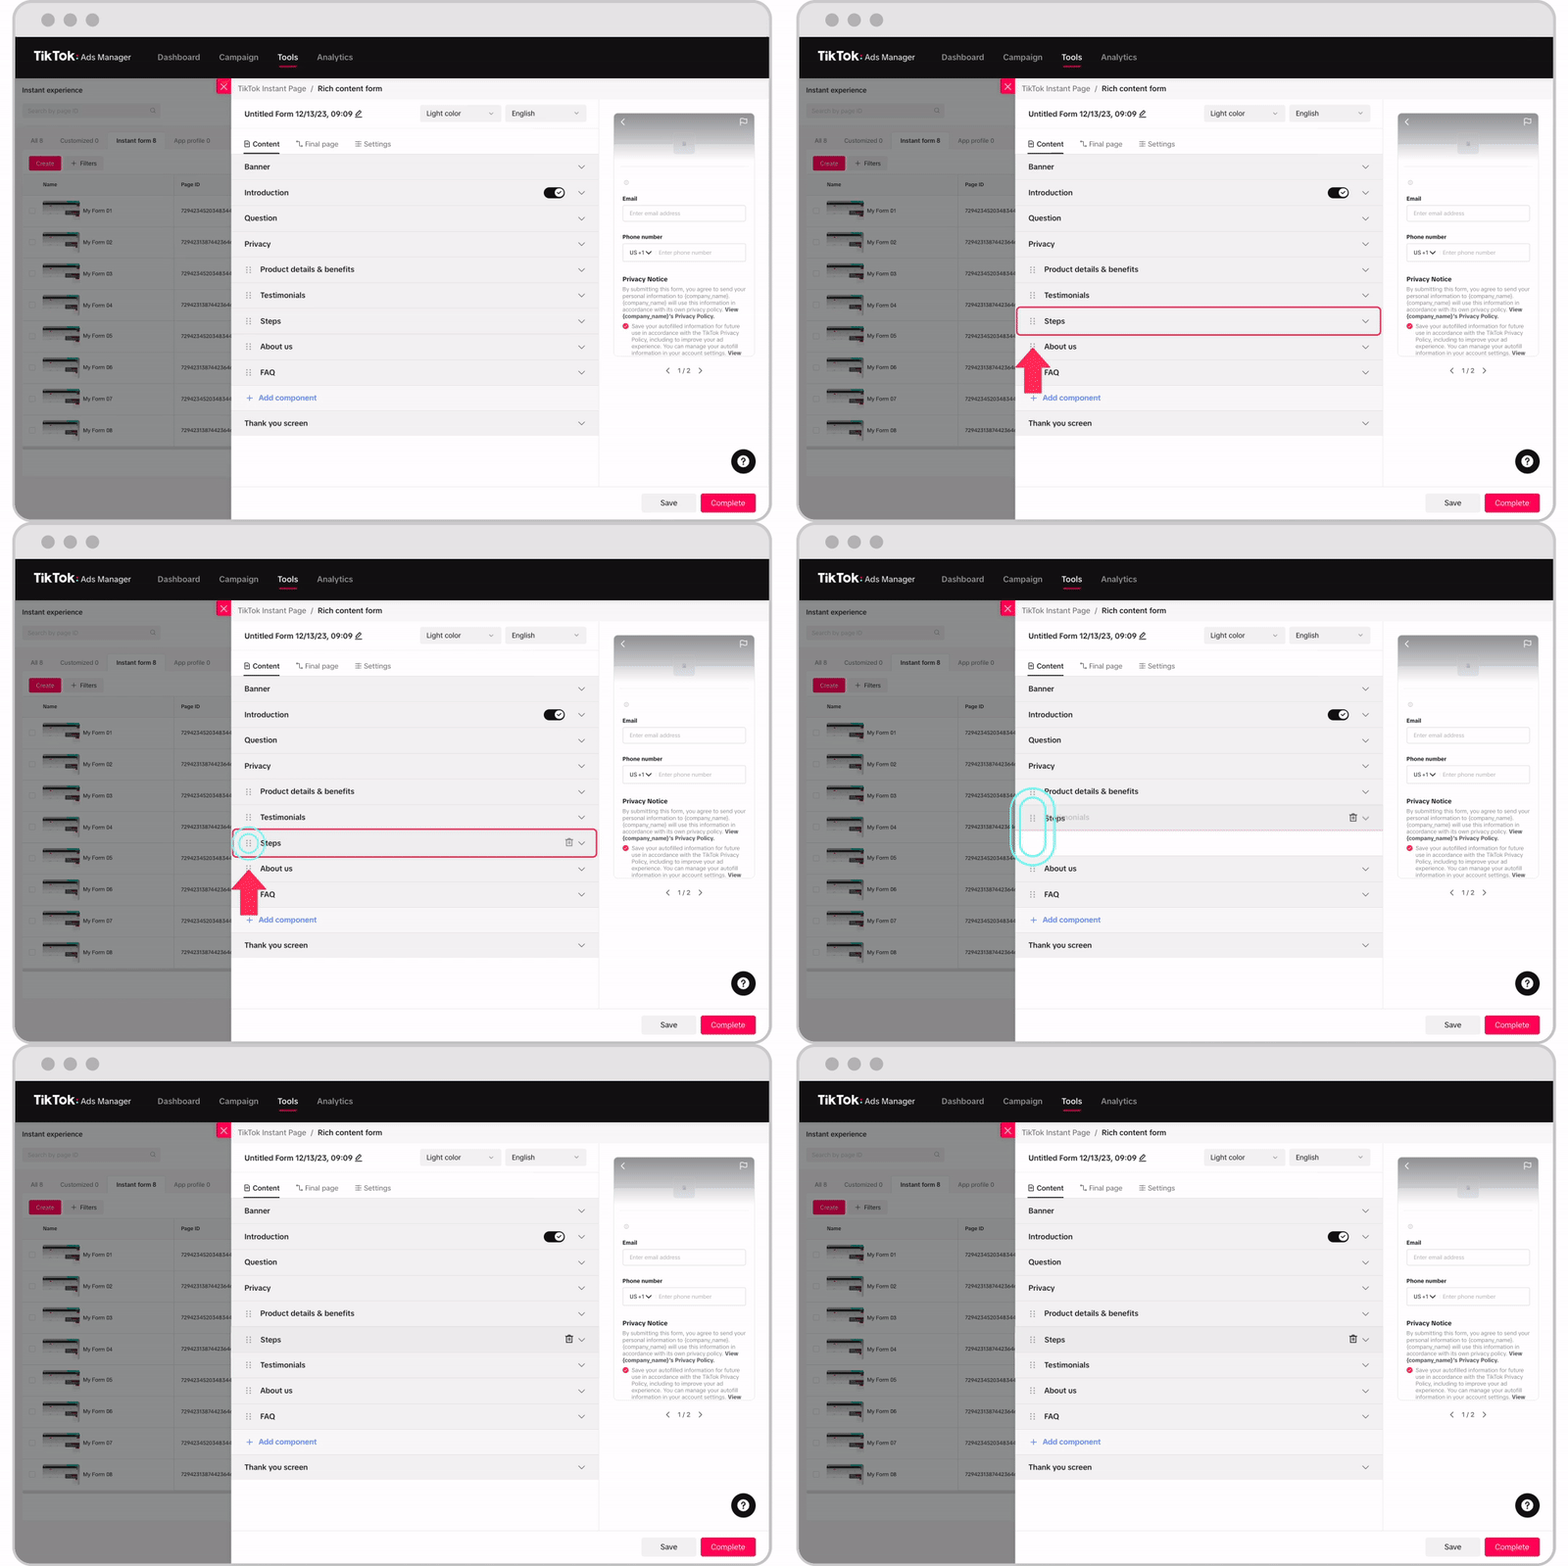
Drag components to reorder them.

On the Thank You screen, add a Thank You page to your form.
Click Complete.


